Project Overview
When the old walnut tree in my village’s yard was cut down, most people saw firewood. I saw something worth saving. The tree had stood there for decades — long enough to grow thick, dense rings of heartwood — and I managed to salvage three cross-section slabs before they were taken away.
My original plan was simple: turn all three into small side tables. But projects have a way of evolving — and this one took an unexpected turn halfway through, thanks to my wife.
Materials Used
For the table:
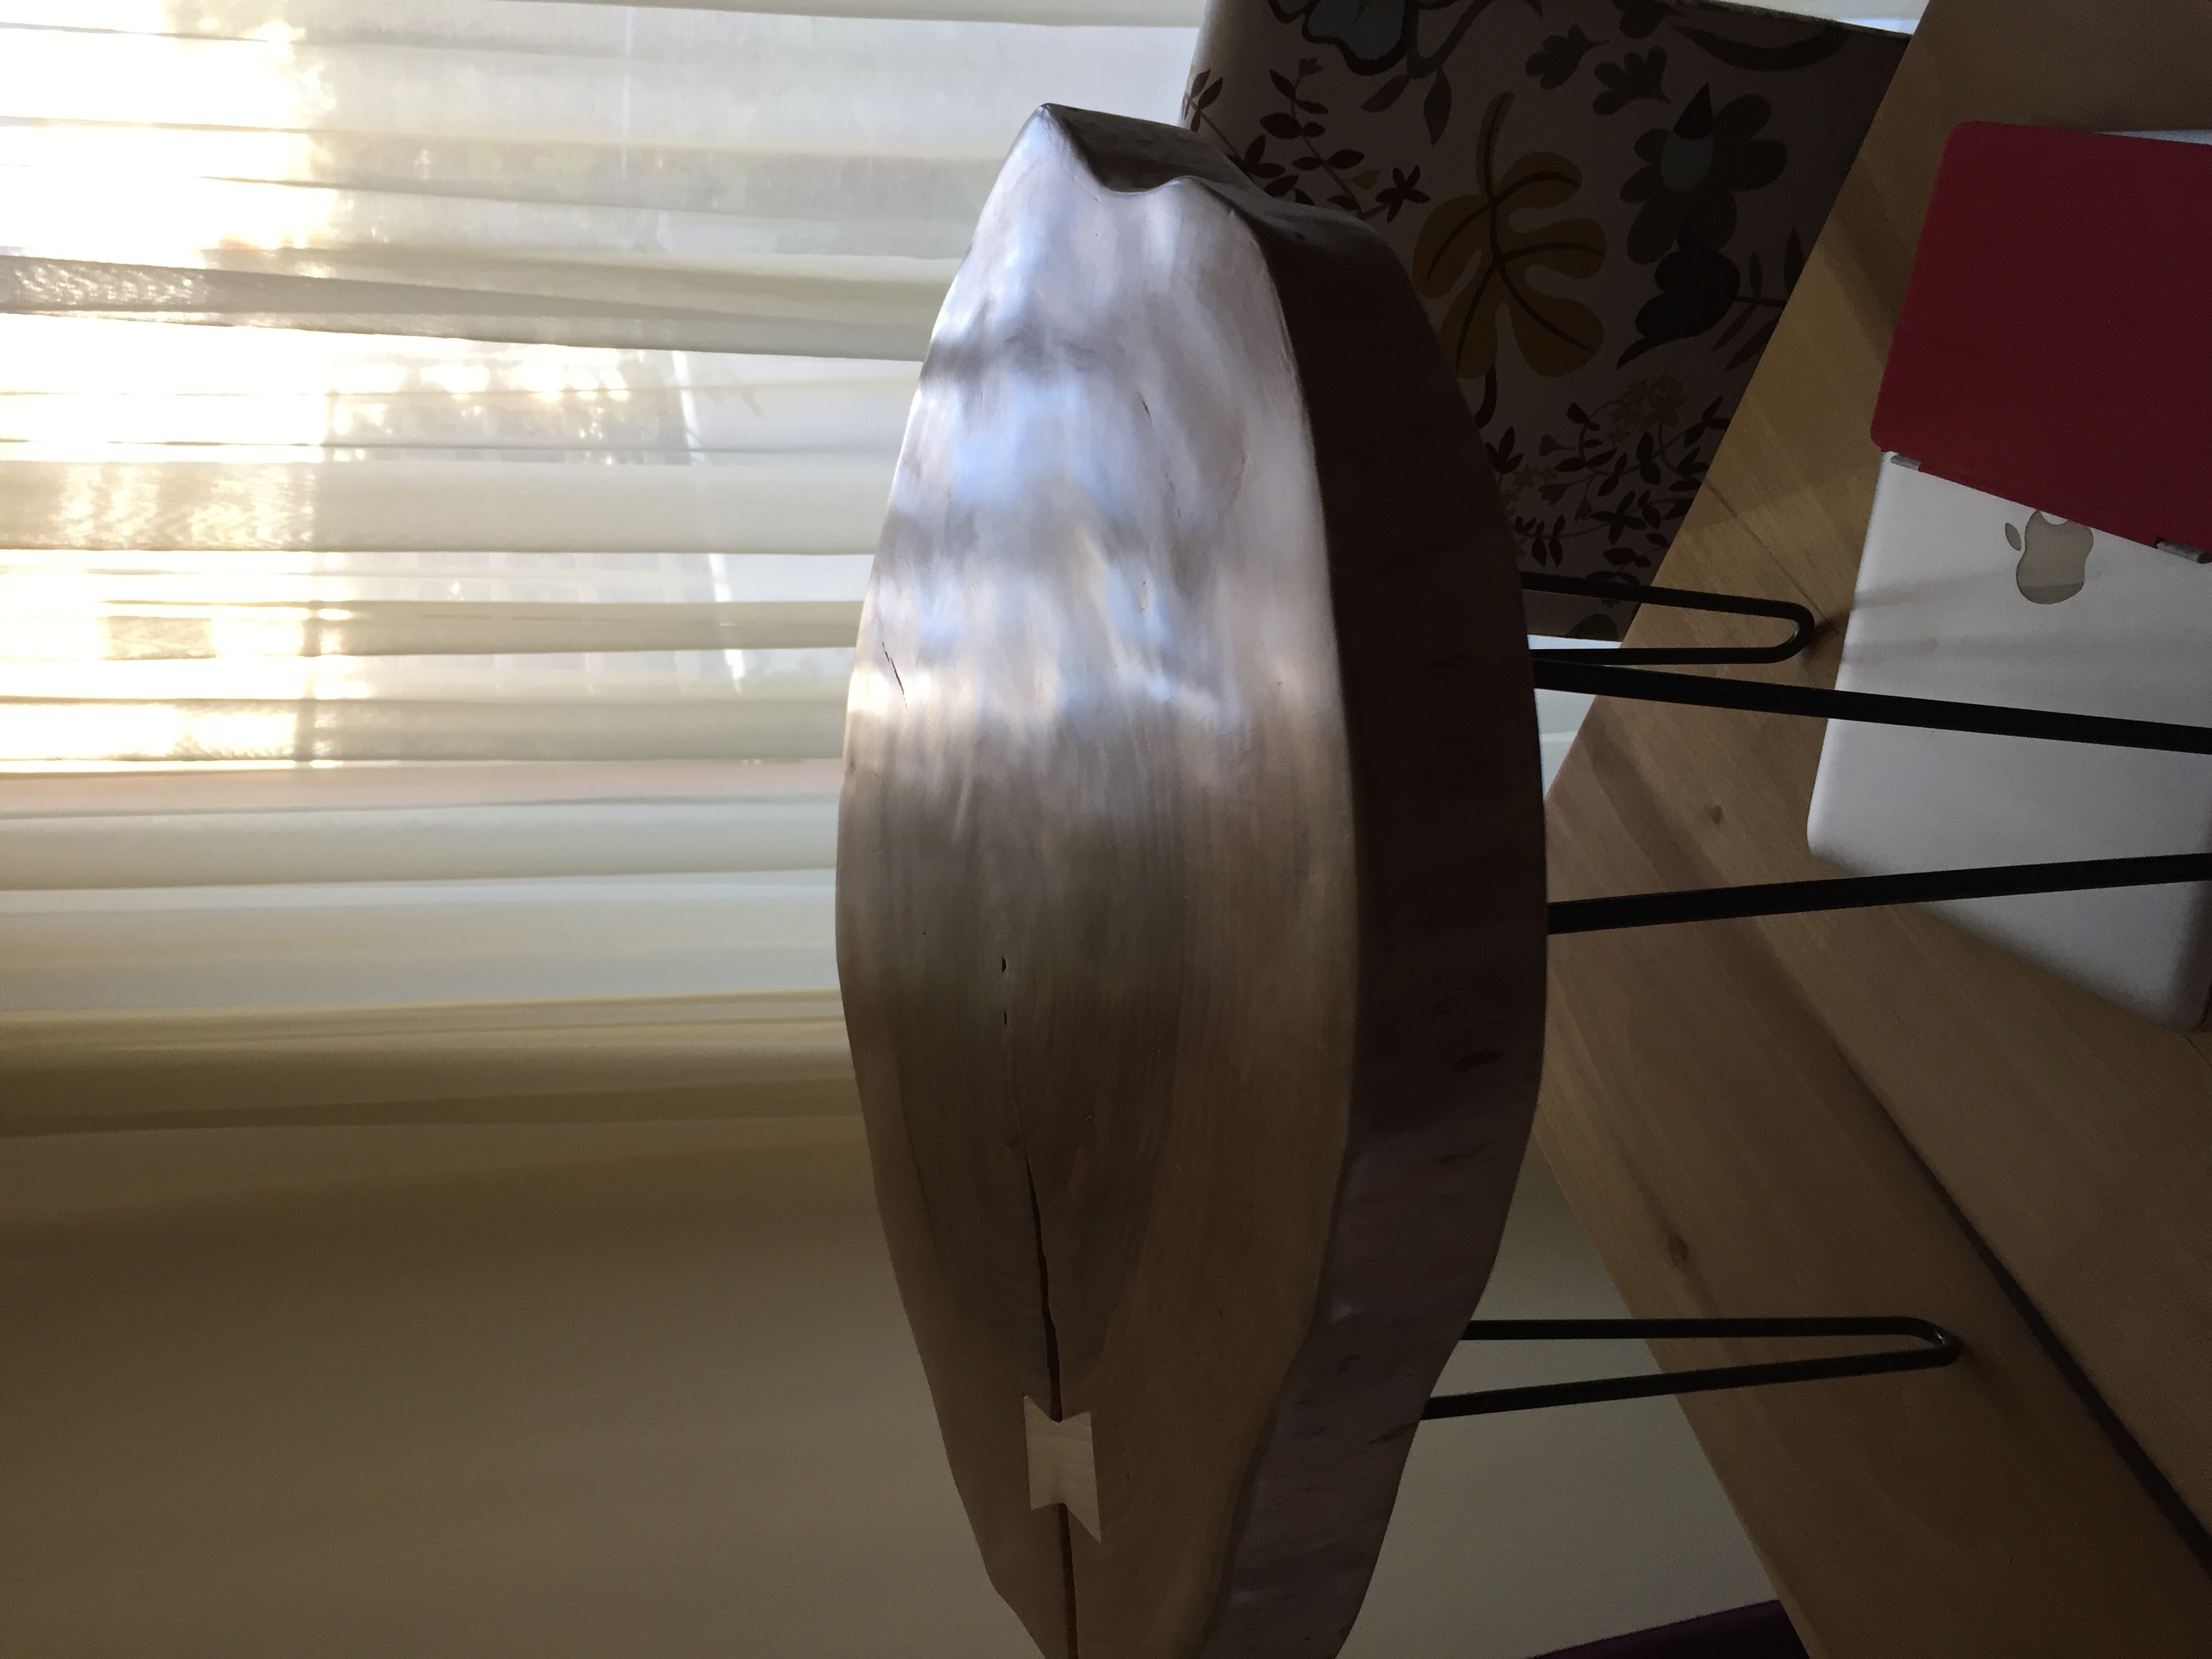
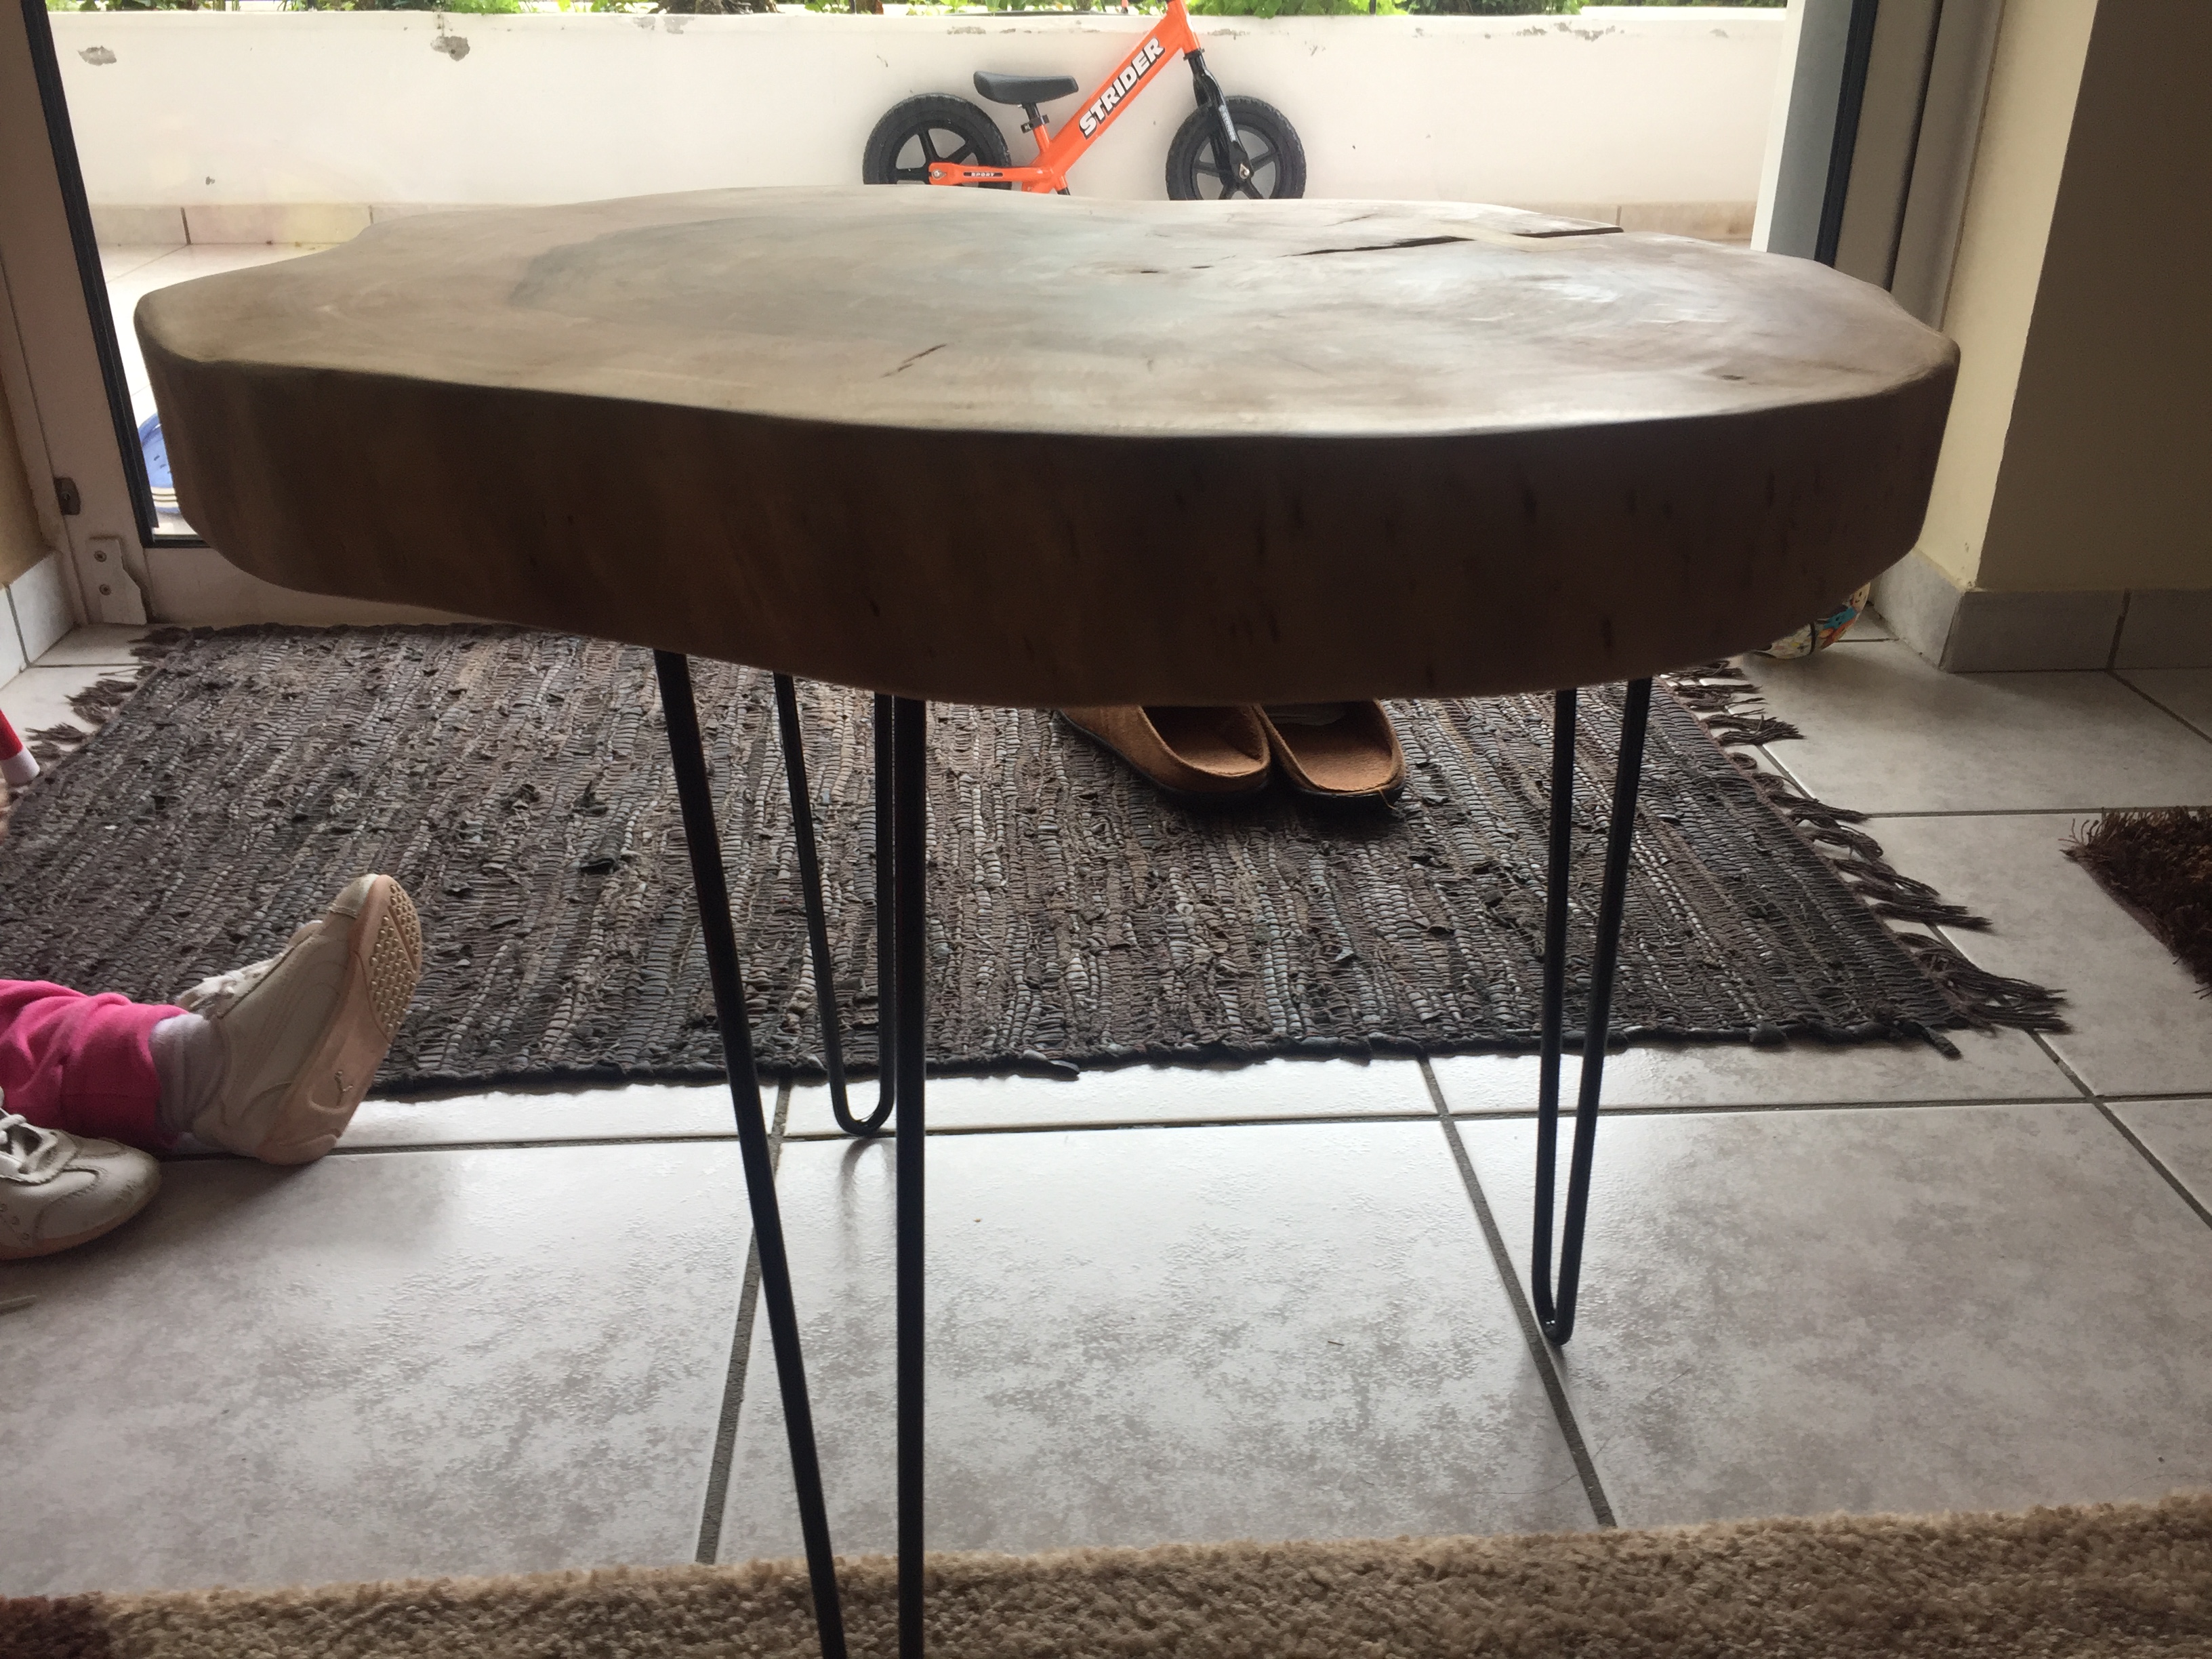
- The large walnut cross-section slab (~80 cm diameter, ~6 cm thick)
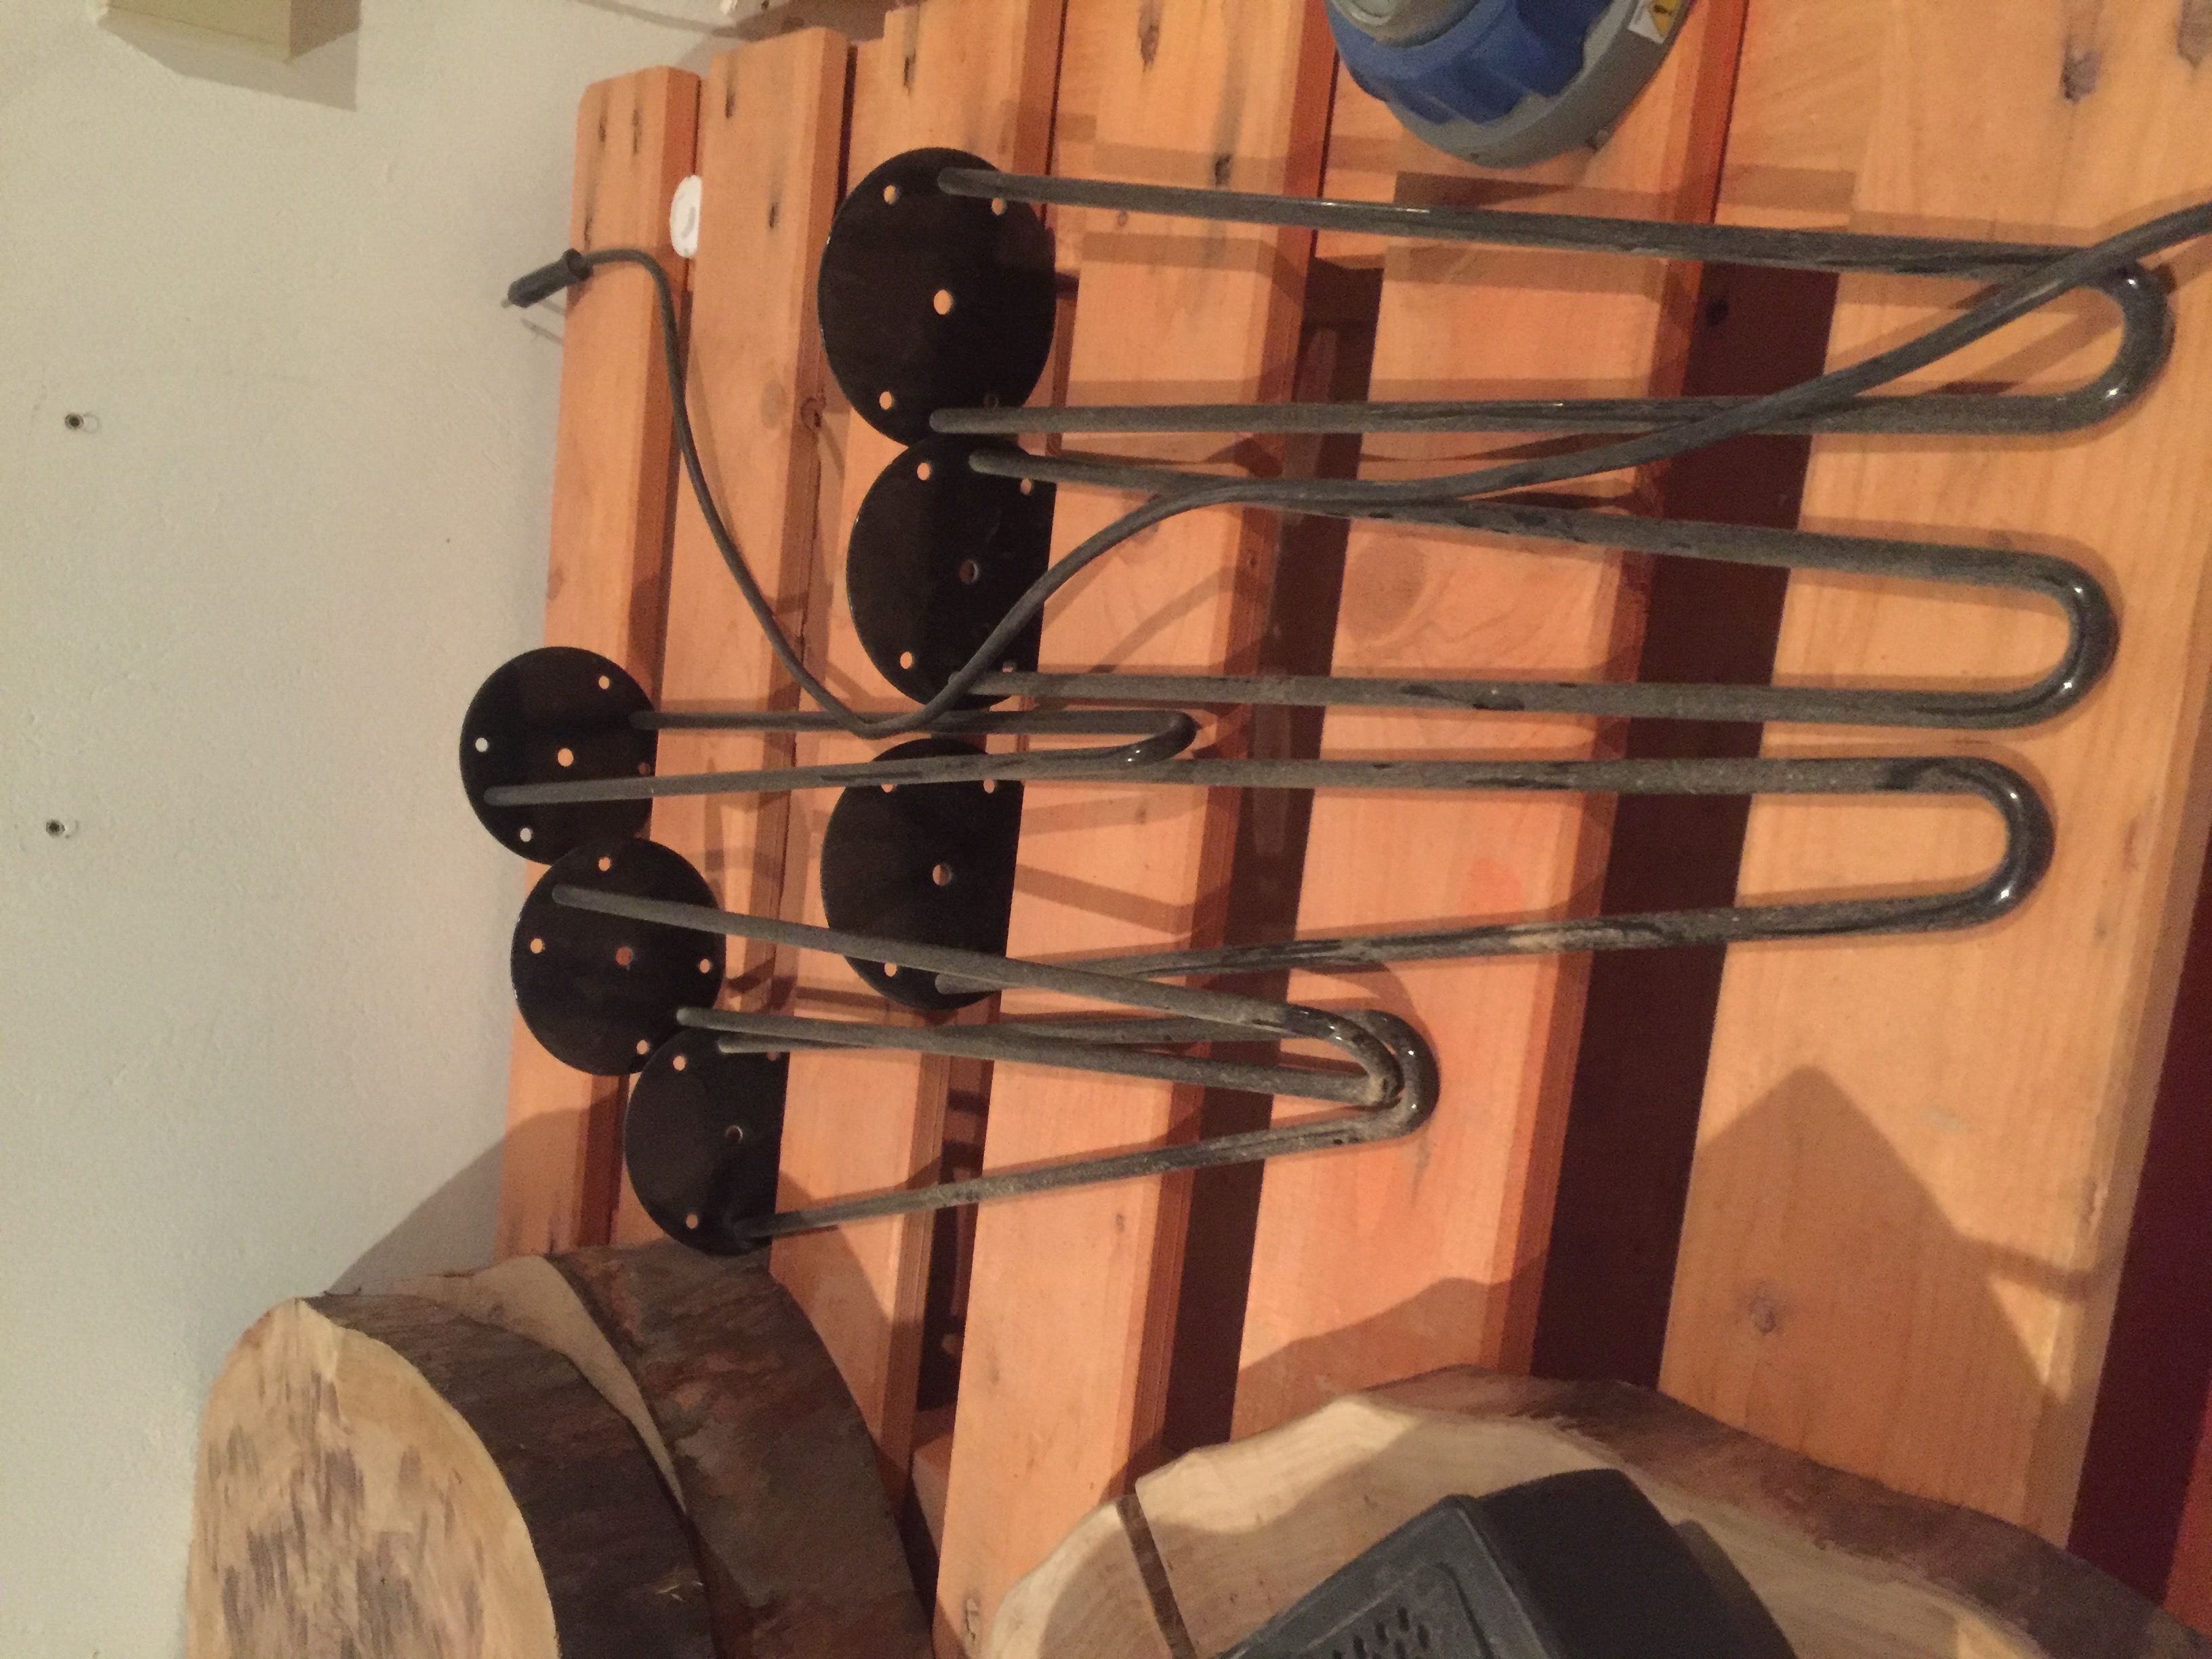
- Set of three black hairpin legs
- Butterfly/bow-tie hardwood inlay (to stabilize a natural crack in the slab)
- Orbital sander + sandpaper (80, 120, 180, 240 grit)
- Wood oil finish
For the lights:
- Two thinner walnut cross-section slabs
- Electrical cable (black textile-wrapped, 3 drops per fixture)
- 7× Edison-style filament bulbs (E27)
- Pendant lamp holders (black plastic)
- Ceiling canopy hardware
The Table
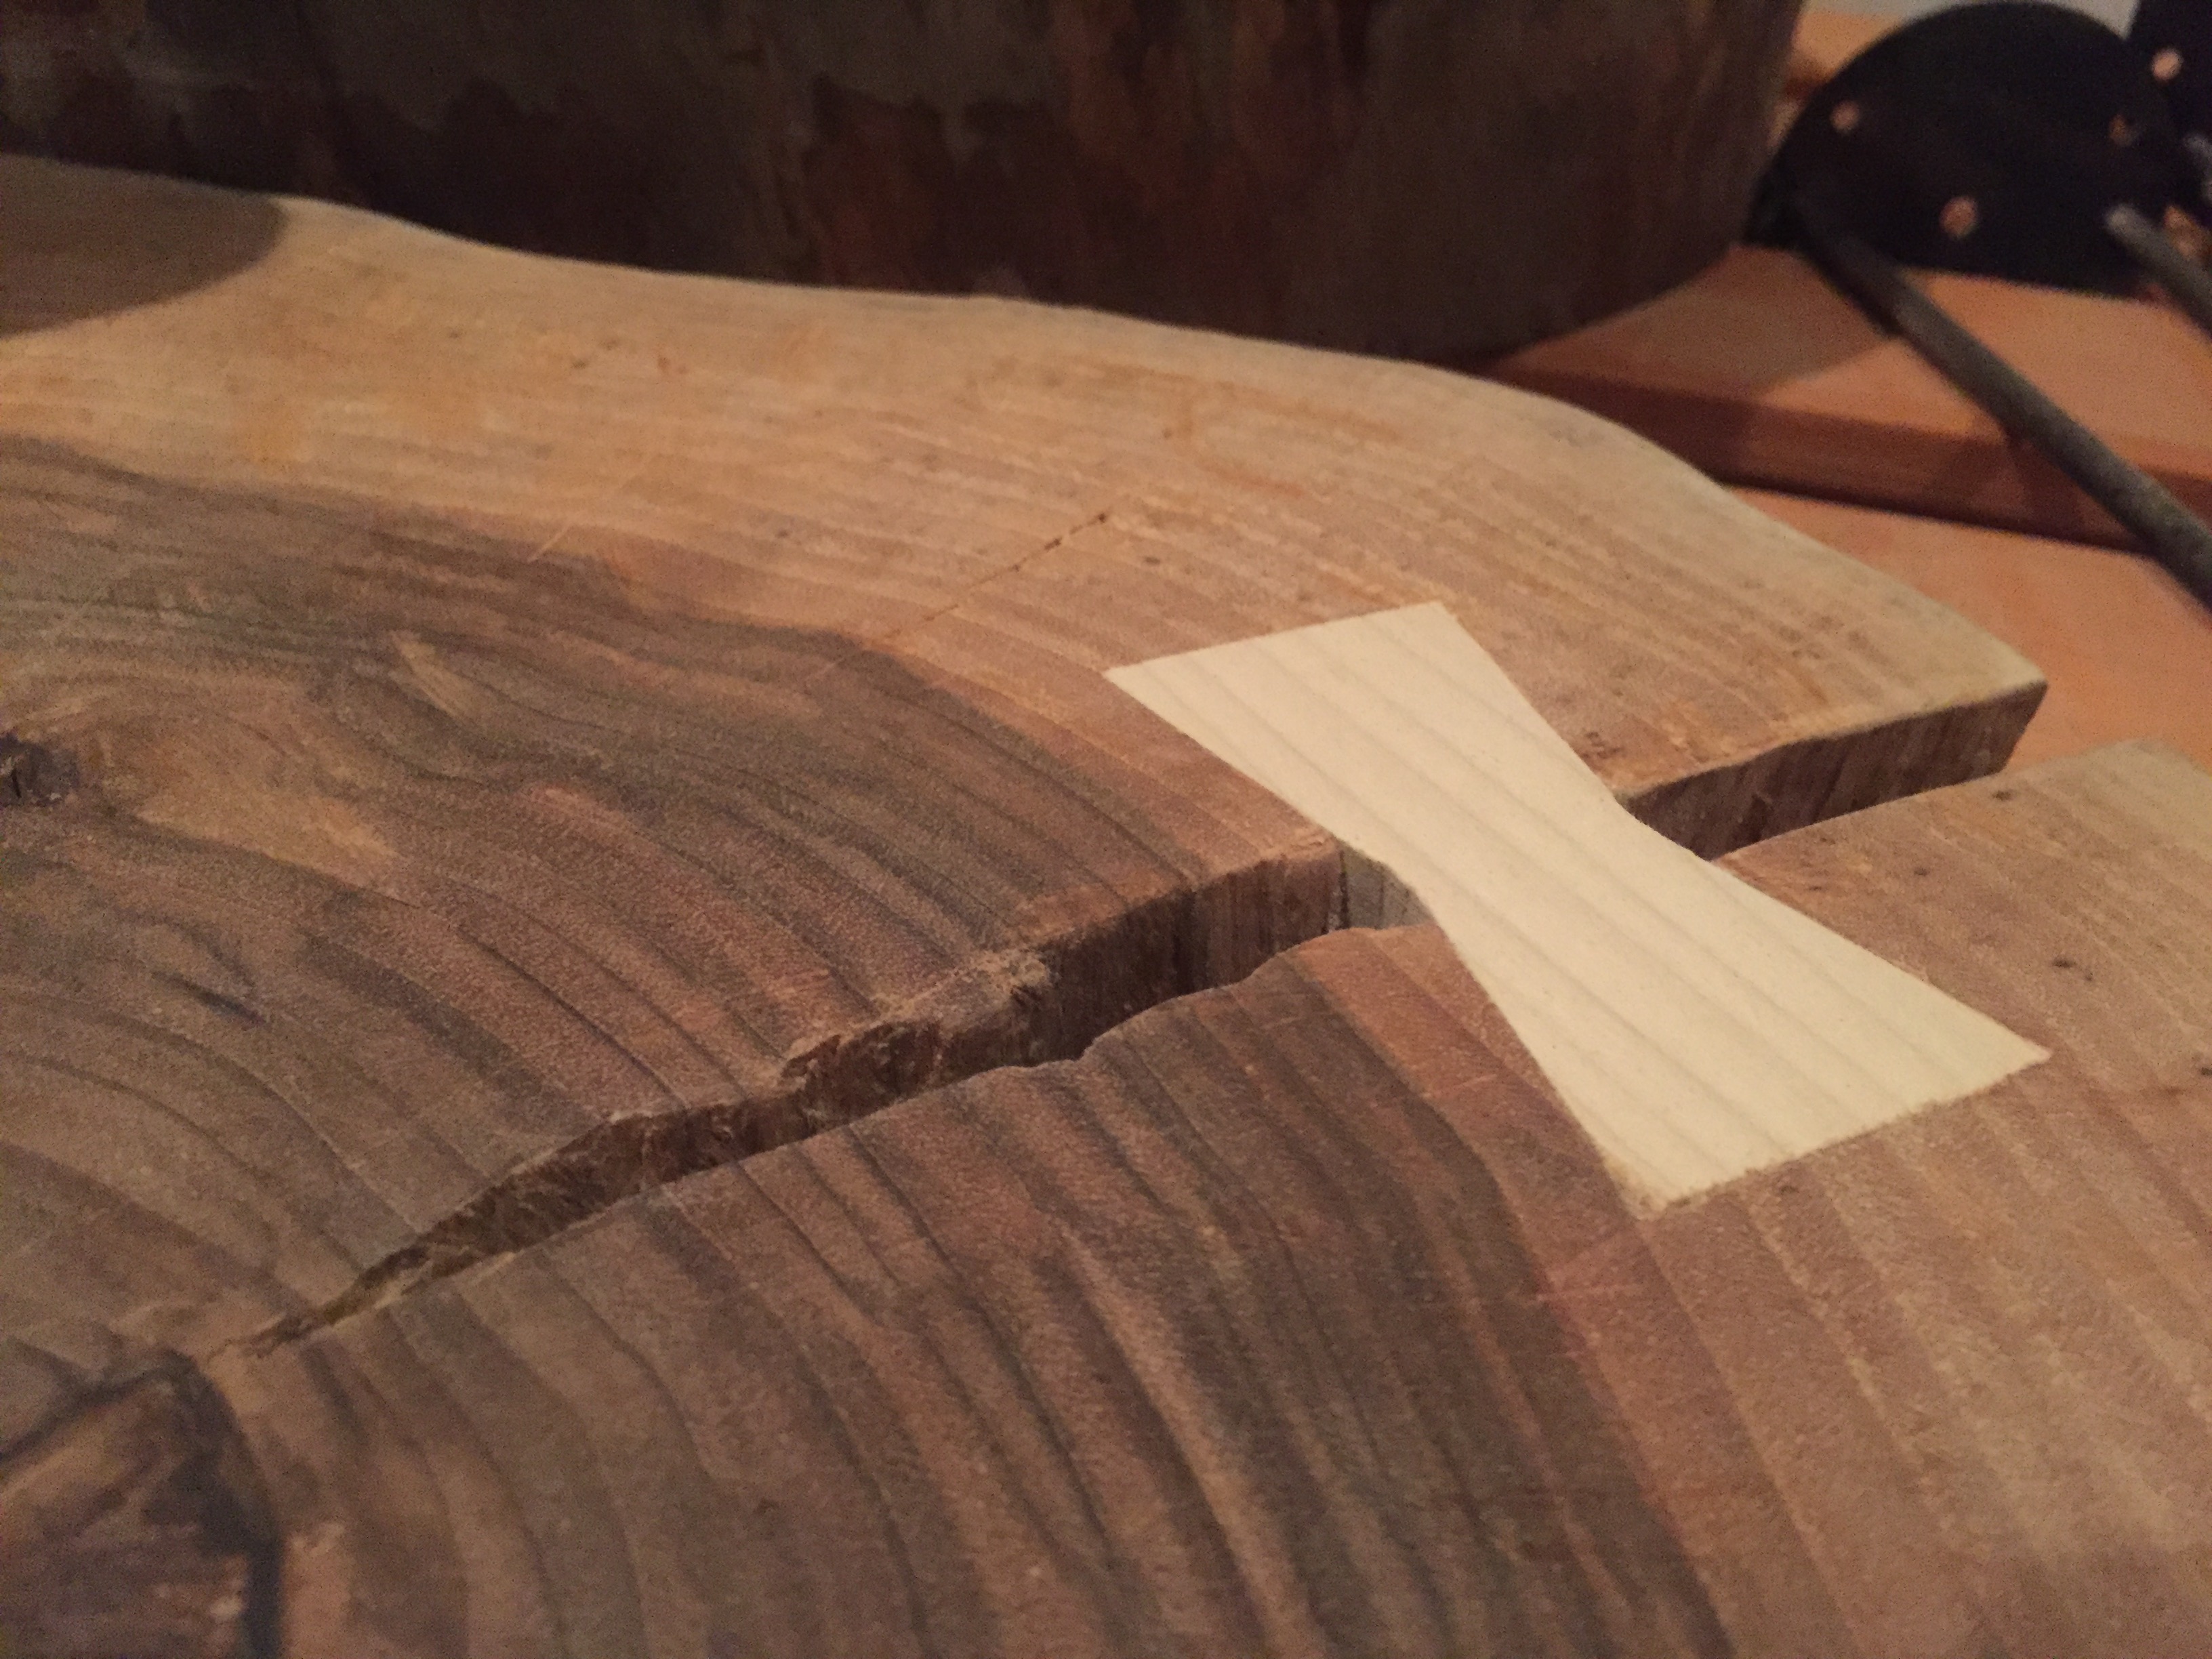
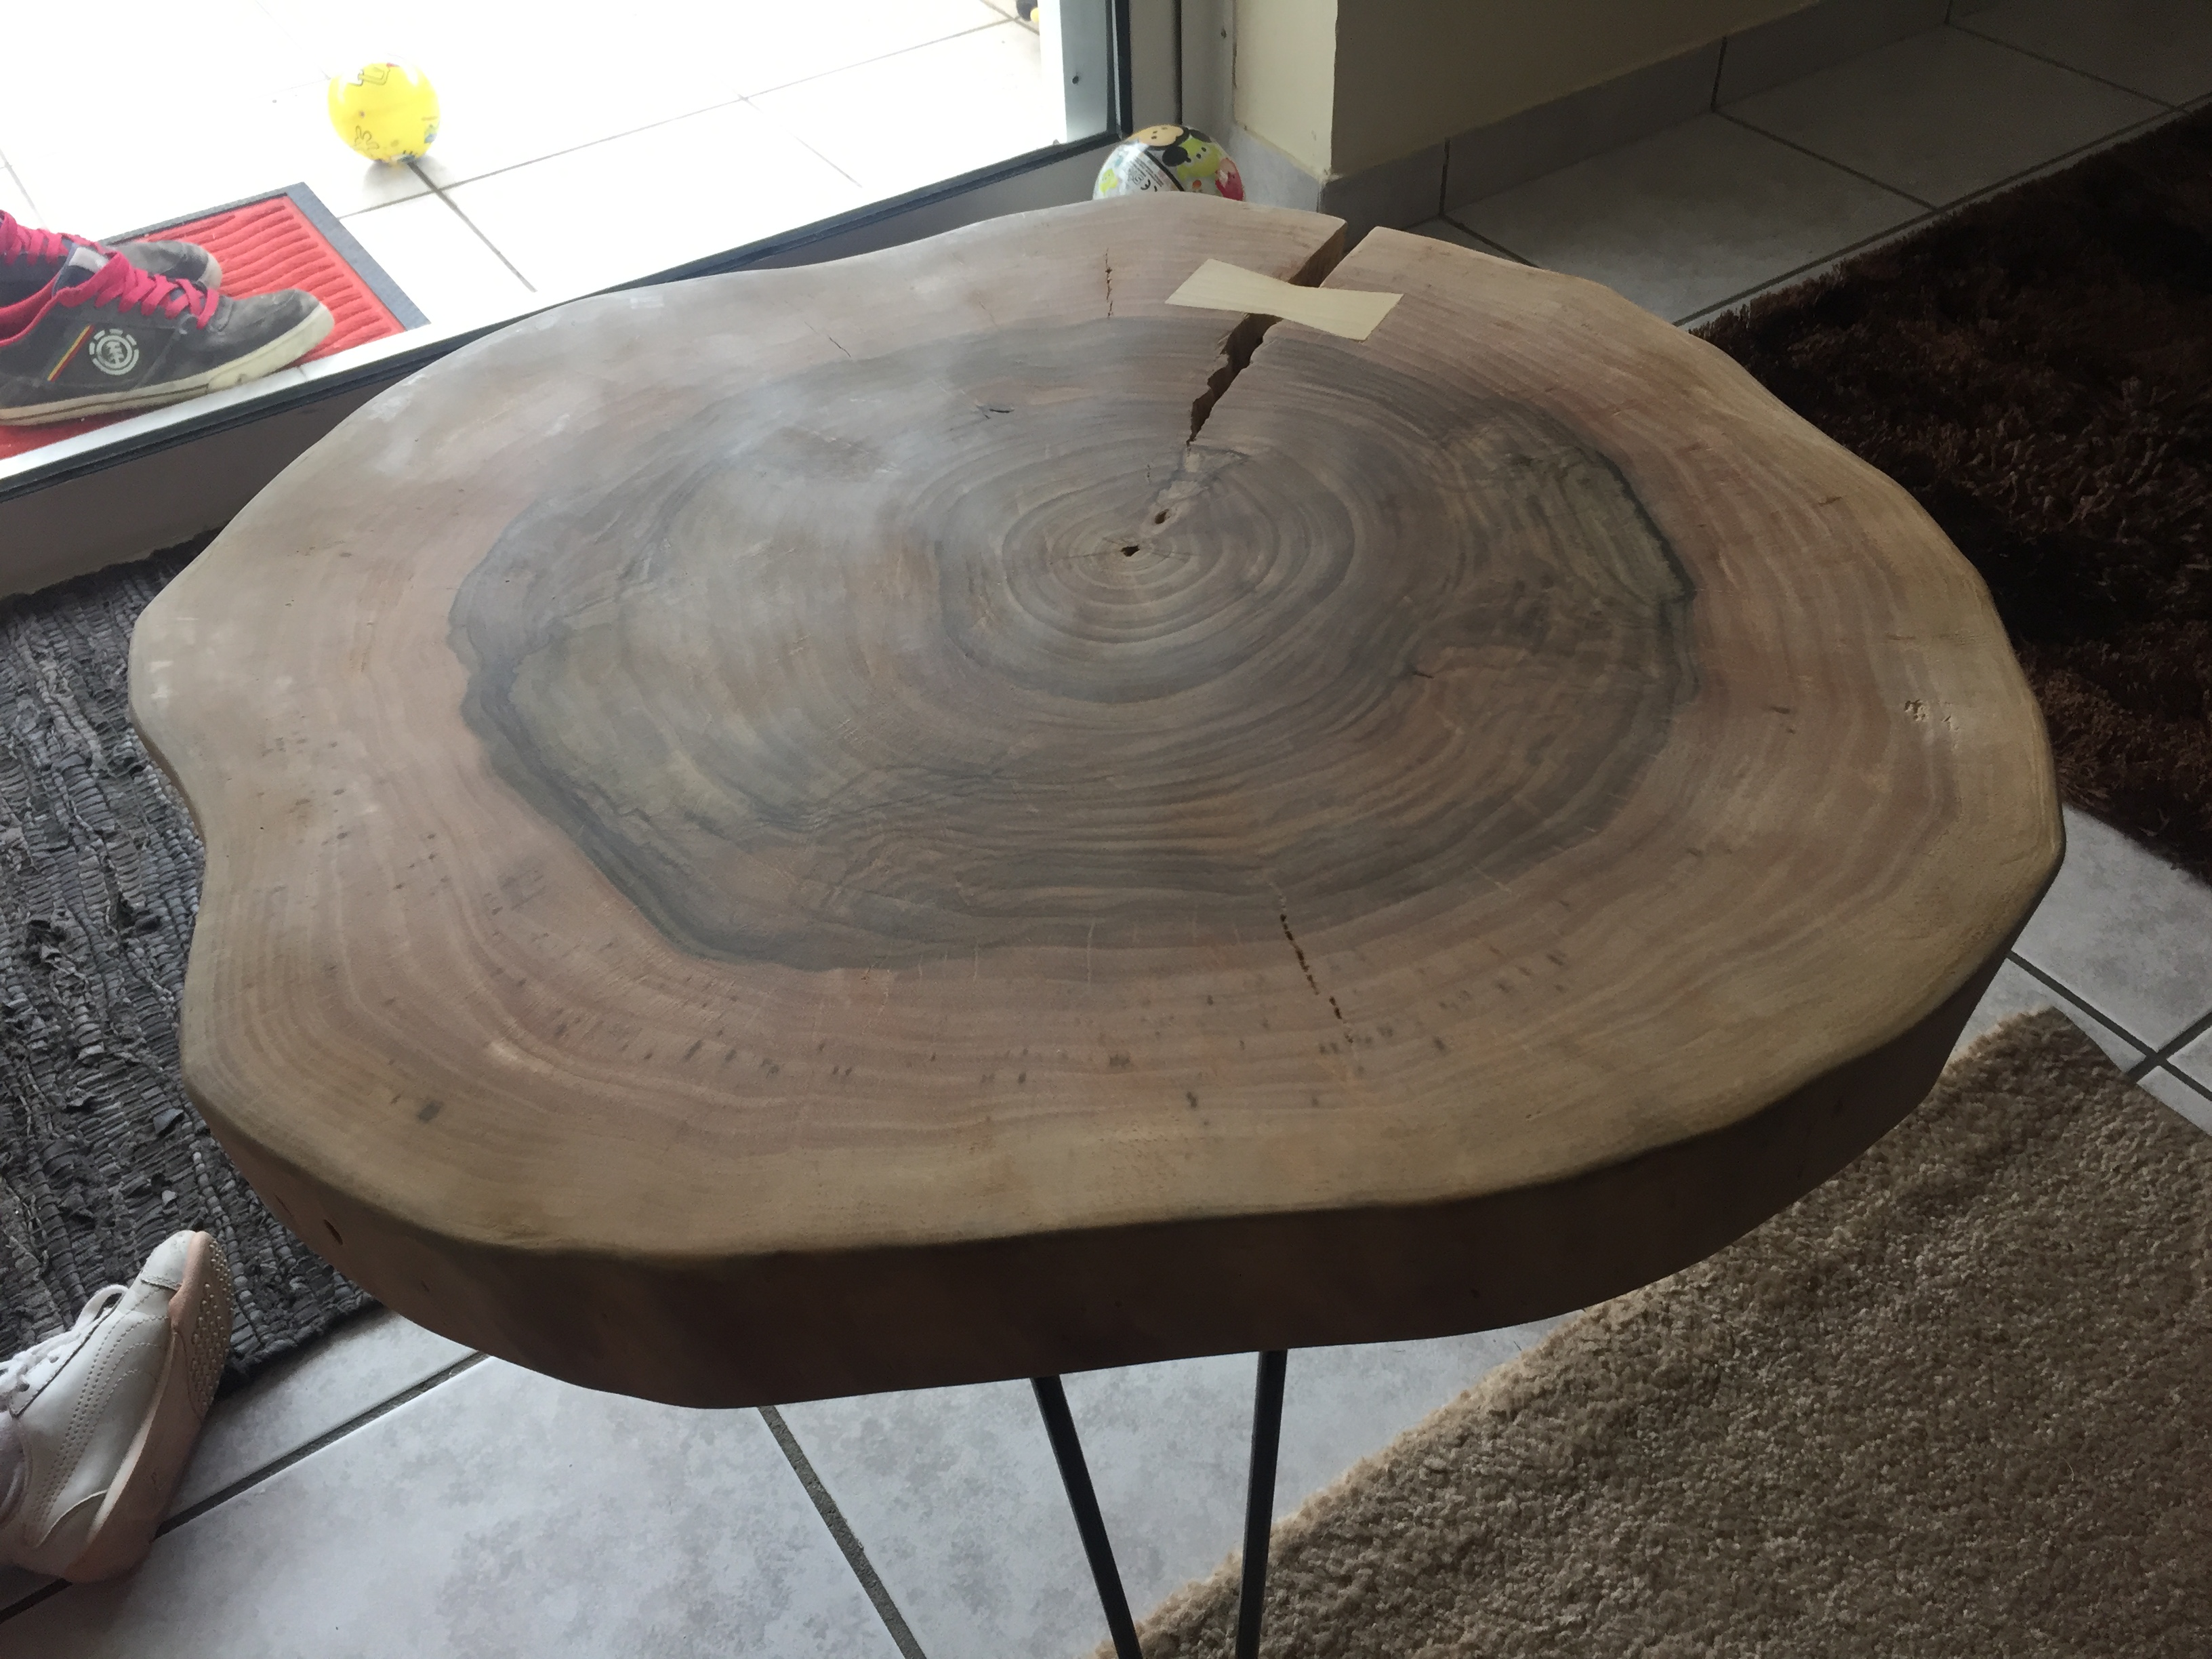
The largest of the three slabs had the most character — and a significant natural crack running through it. Before doing anything else, I cut a bow-tie inlay from a contrasting piece of hardwood and pressed it across the crack to lock it in place and added some glue. It’s a technique as functional as it is beautiful, and the exposed inlay became one of the most striking details of the finished piece.
All three slabs then went through the same preparation process:
- Sanding — Starting with 60-grit to flatten the surface and remove bark from the edges, working up through 240-grit until the grain came alive under my hands. A Bosch orbital sander did most of the heavy lifting, but the live edge required patience with freehand sanding.
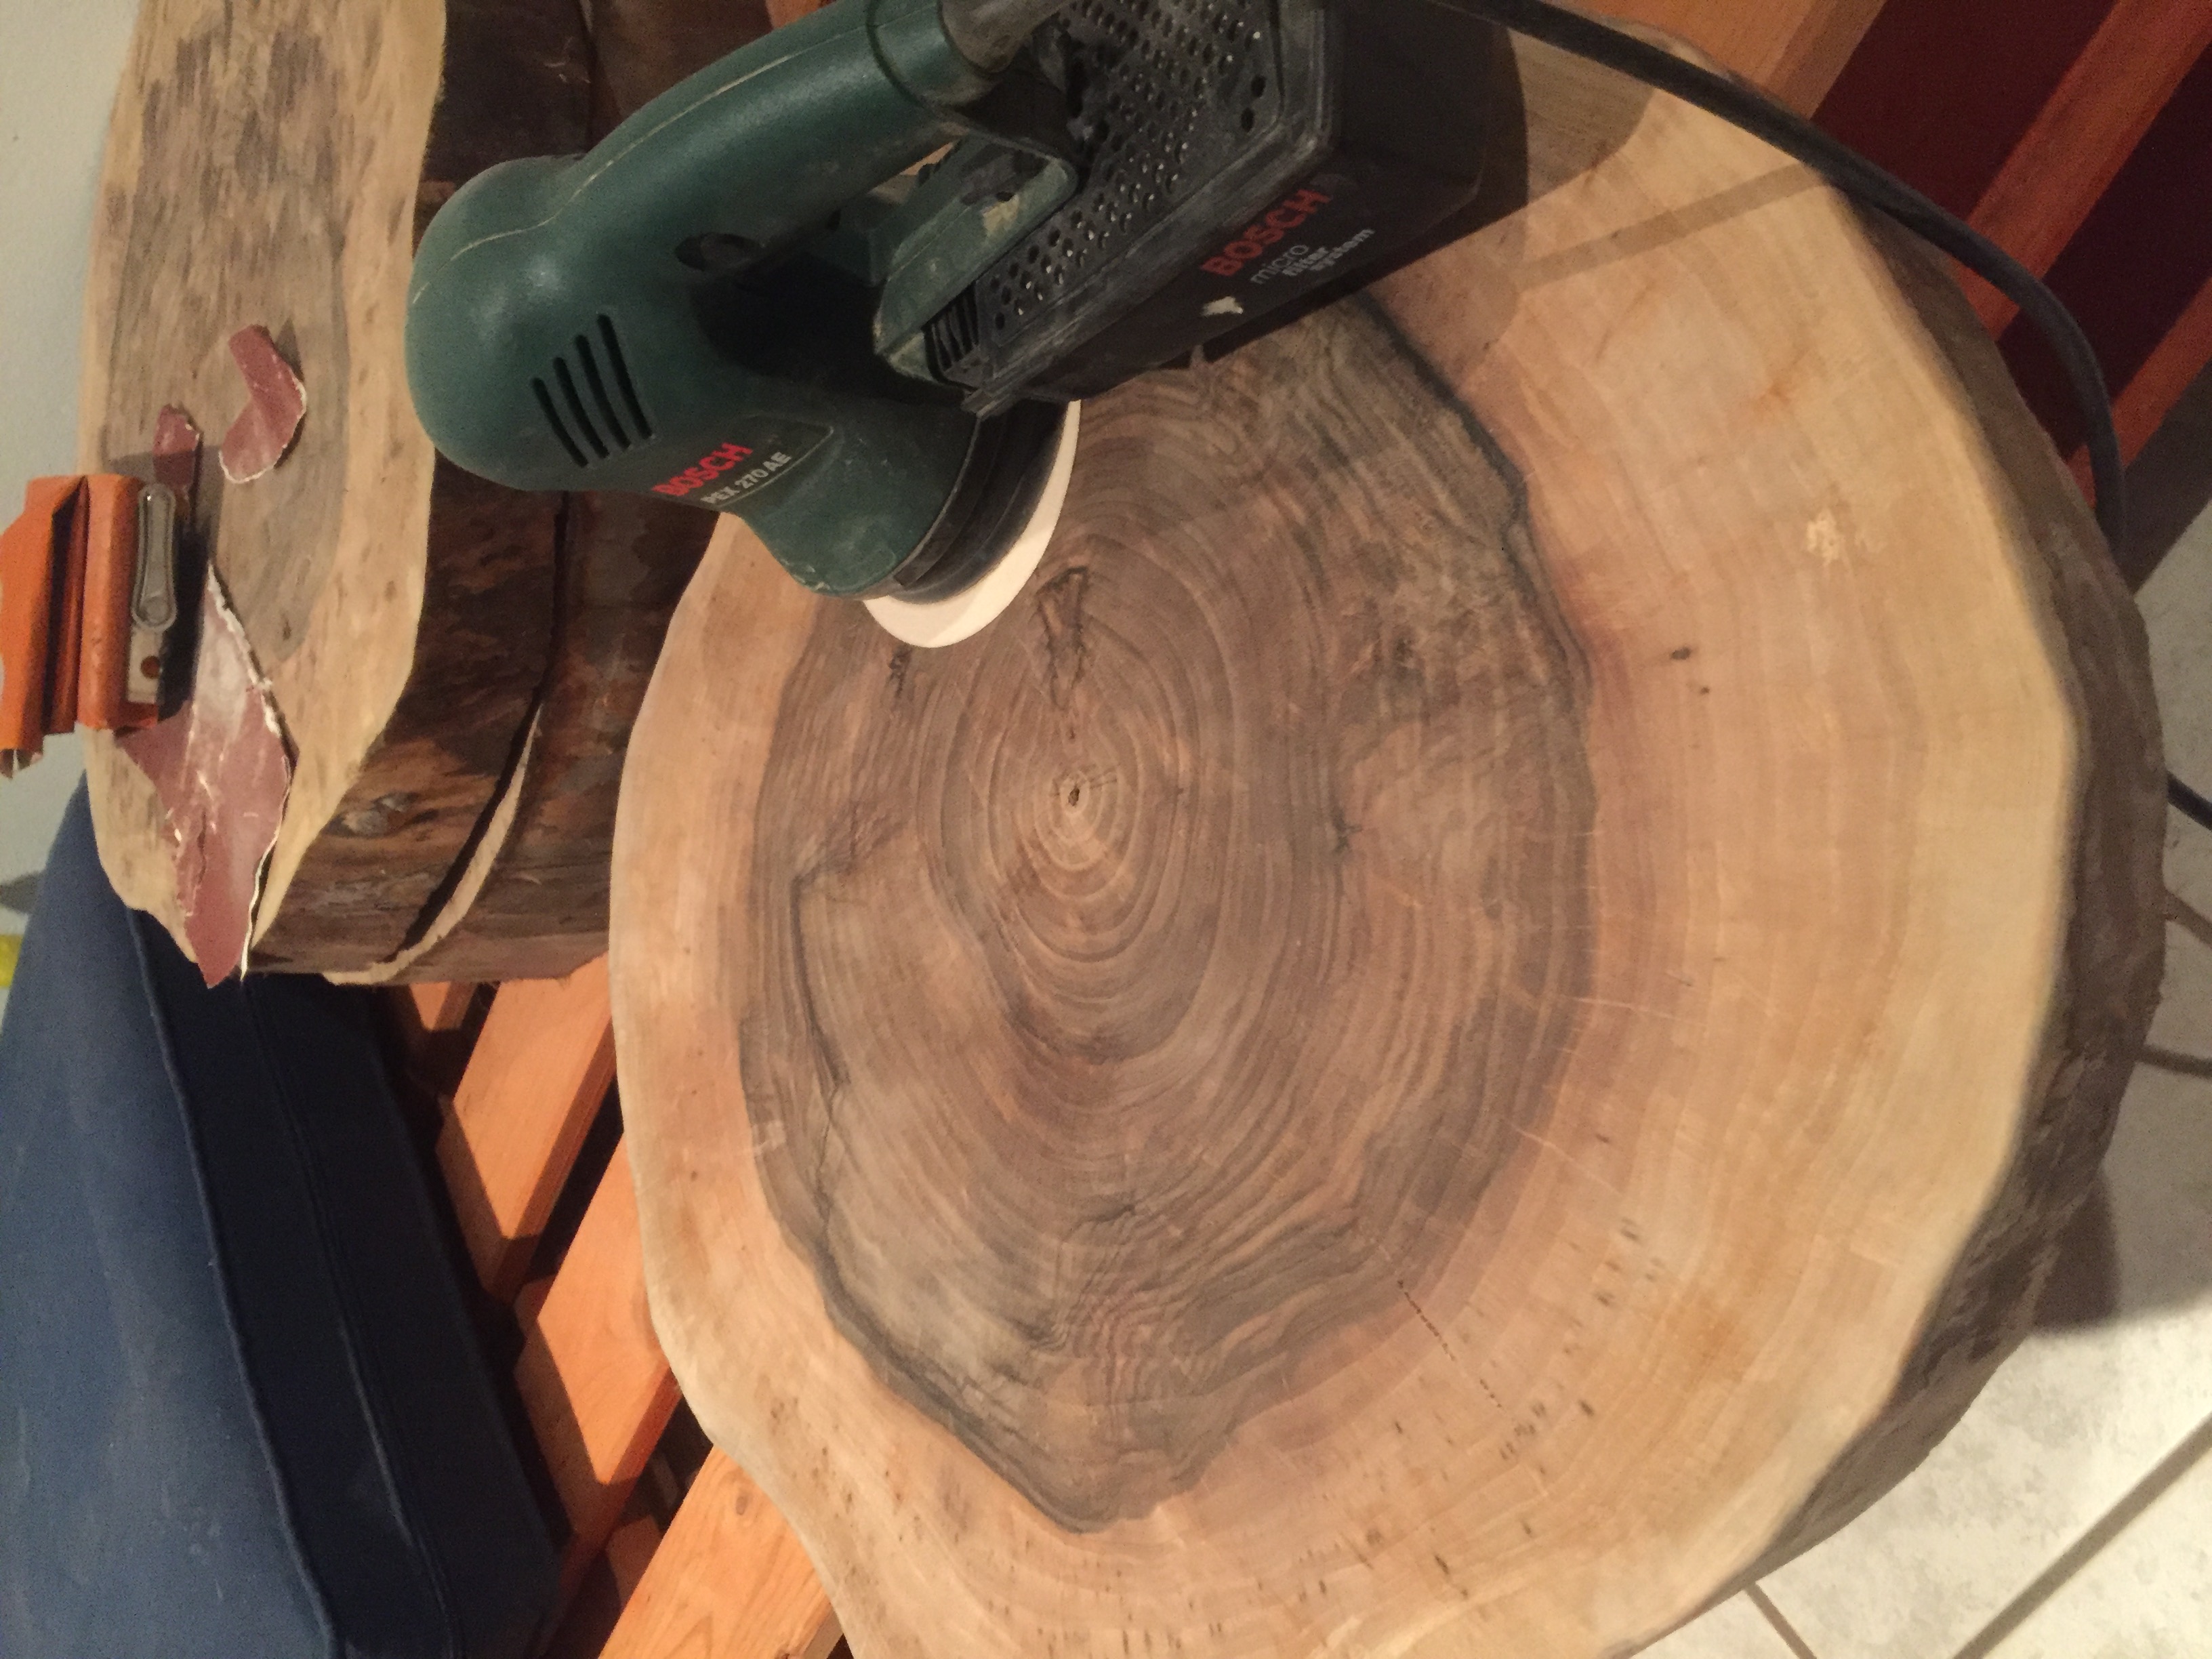
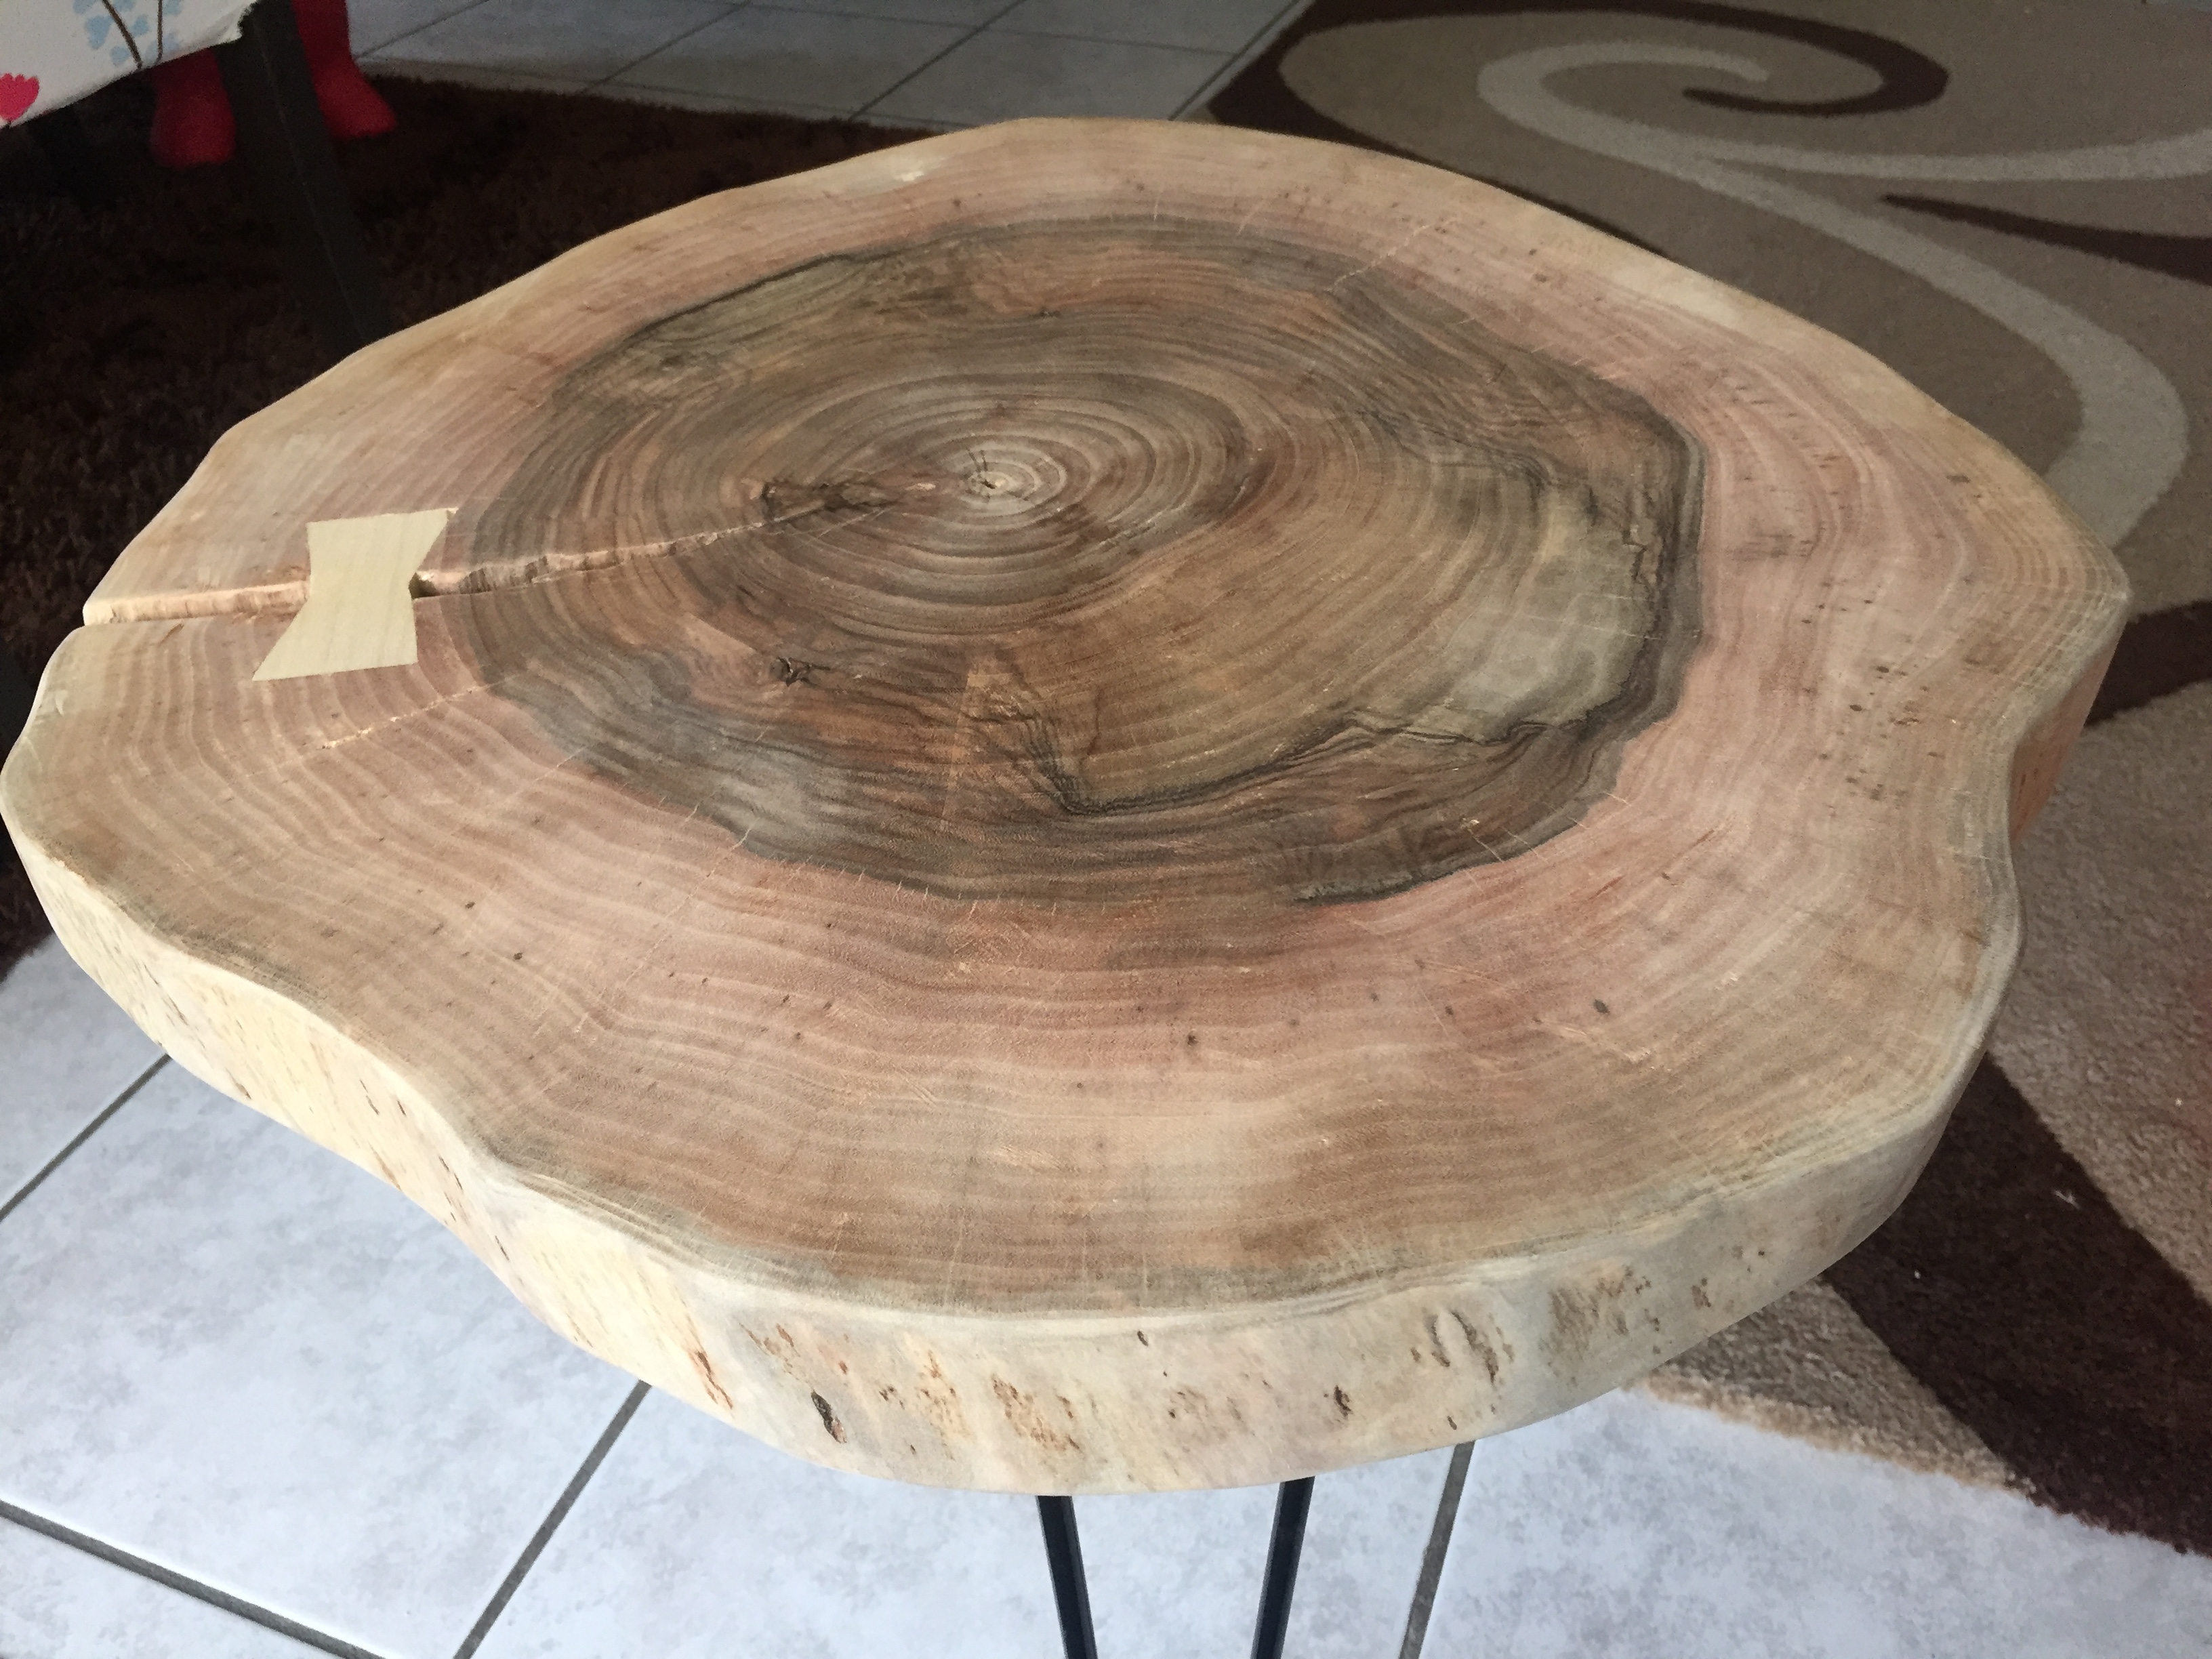
- Finishing — All three slabs were taken outside and varnished together in the sun. The water-based satin varnish reacted beautifully with the walnut, deepening the colour and making the growth rings almost glow.
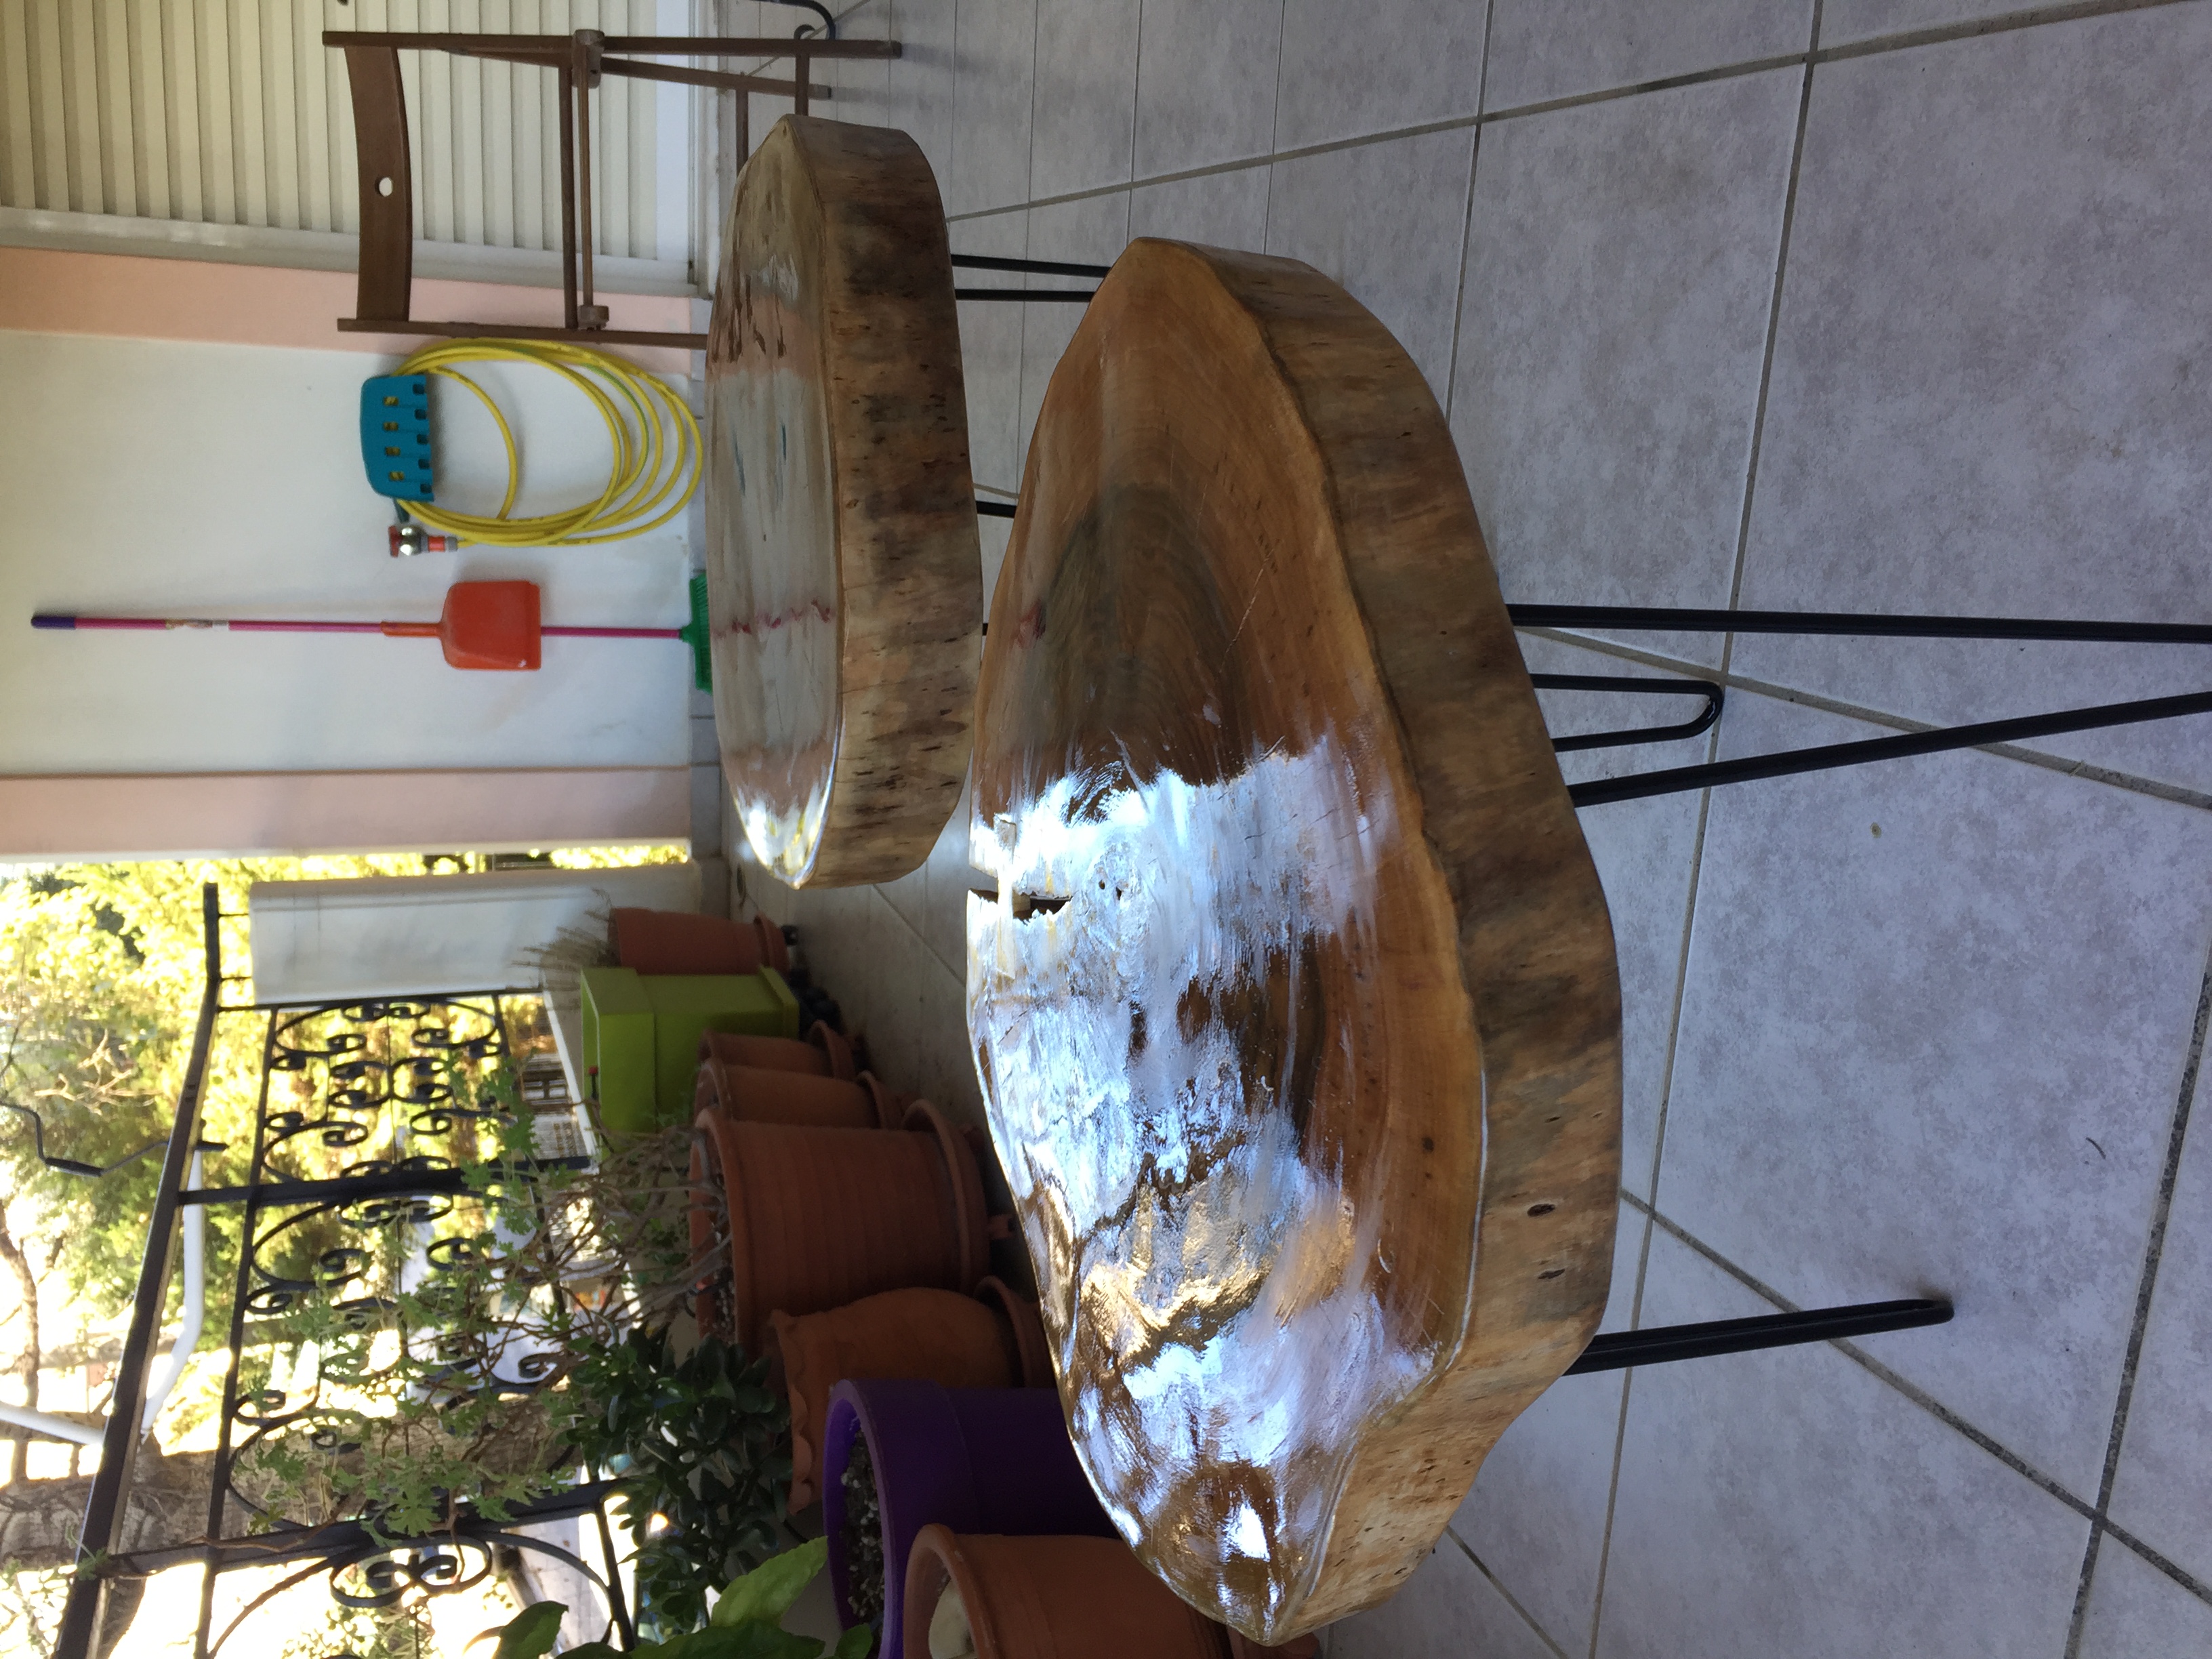
- Legs — The walnut slabs were mounted on three black hairpin legs, which keep the look industrial and minimal, letting the wood take center stage.
The finished table lives in the living room. Every time I look at it, I can still count the rings.
At this point all three were destined to become tables, until my wife saw them laid out and suggested the two smaller ones would make far better ceiling lights. She was right.
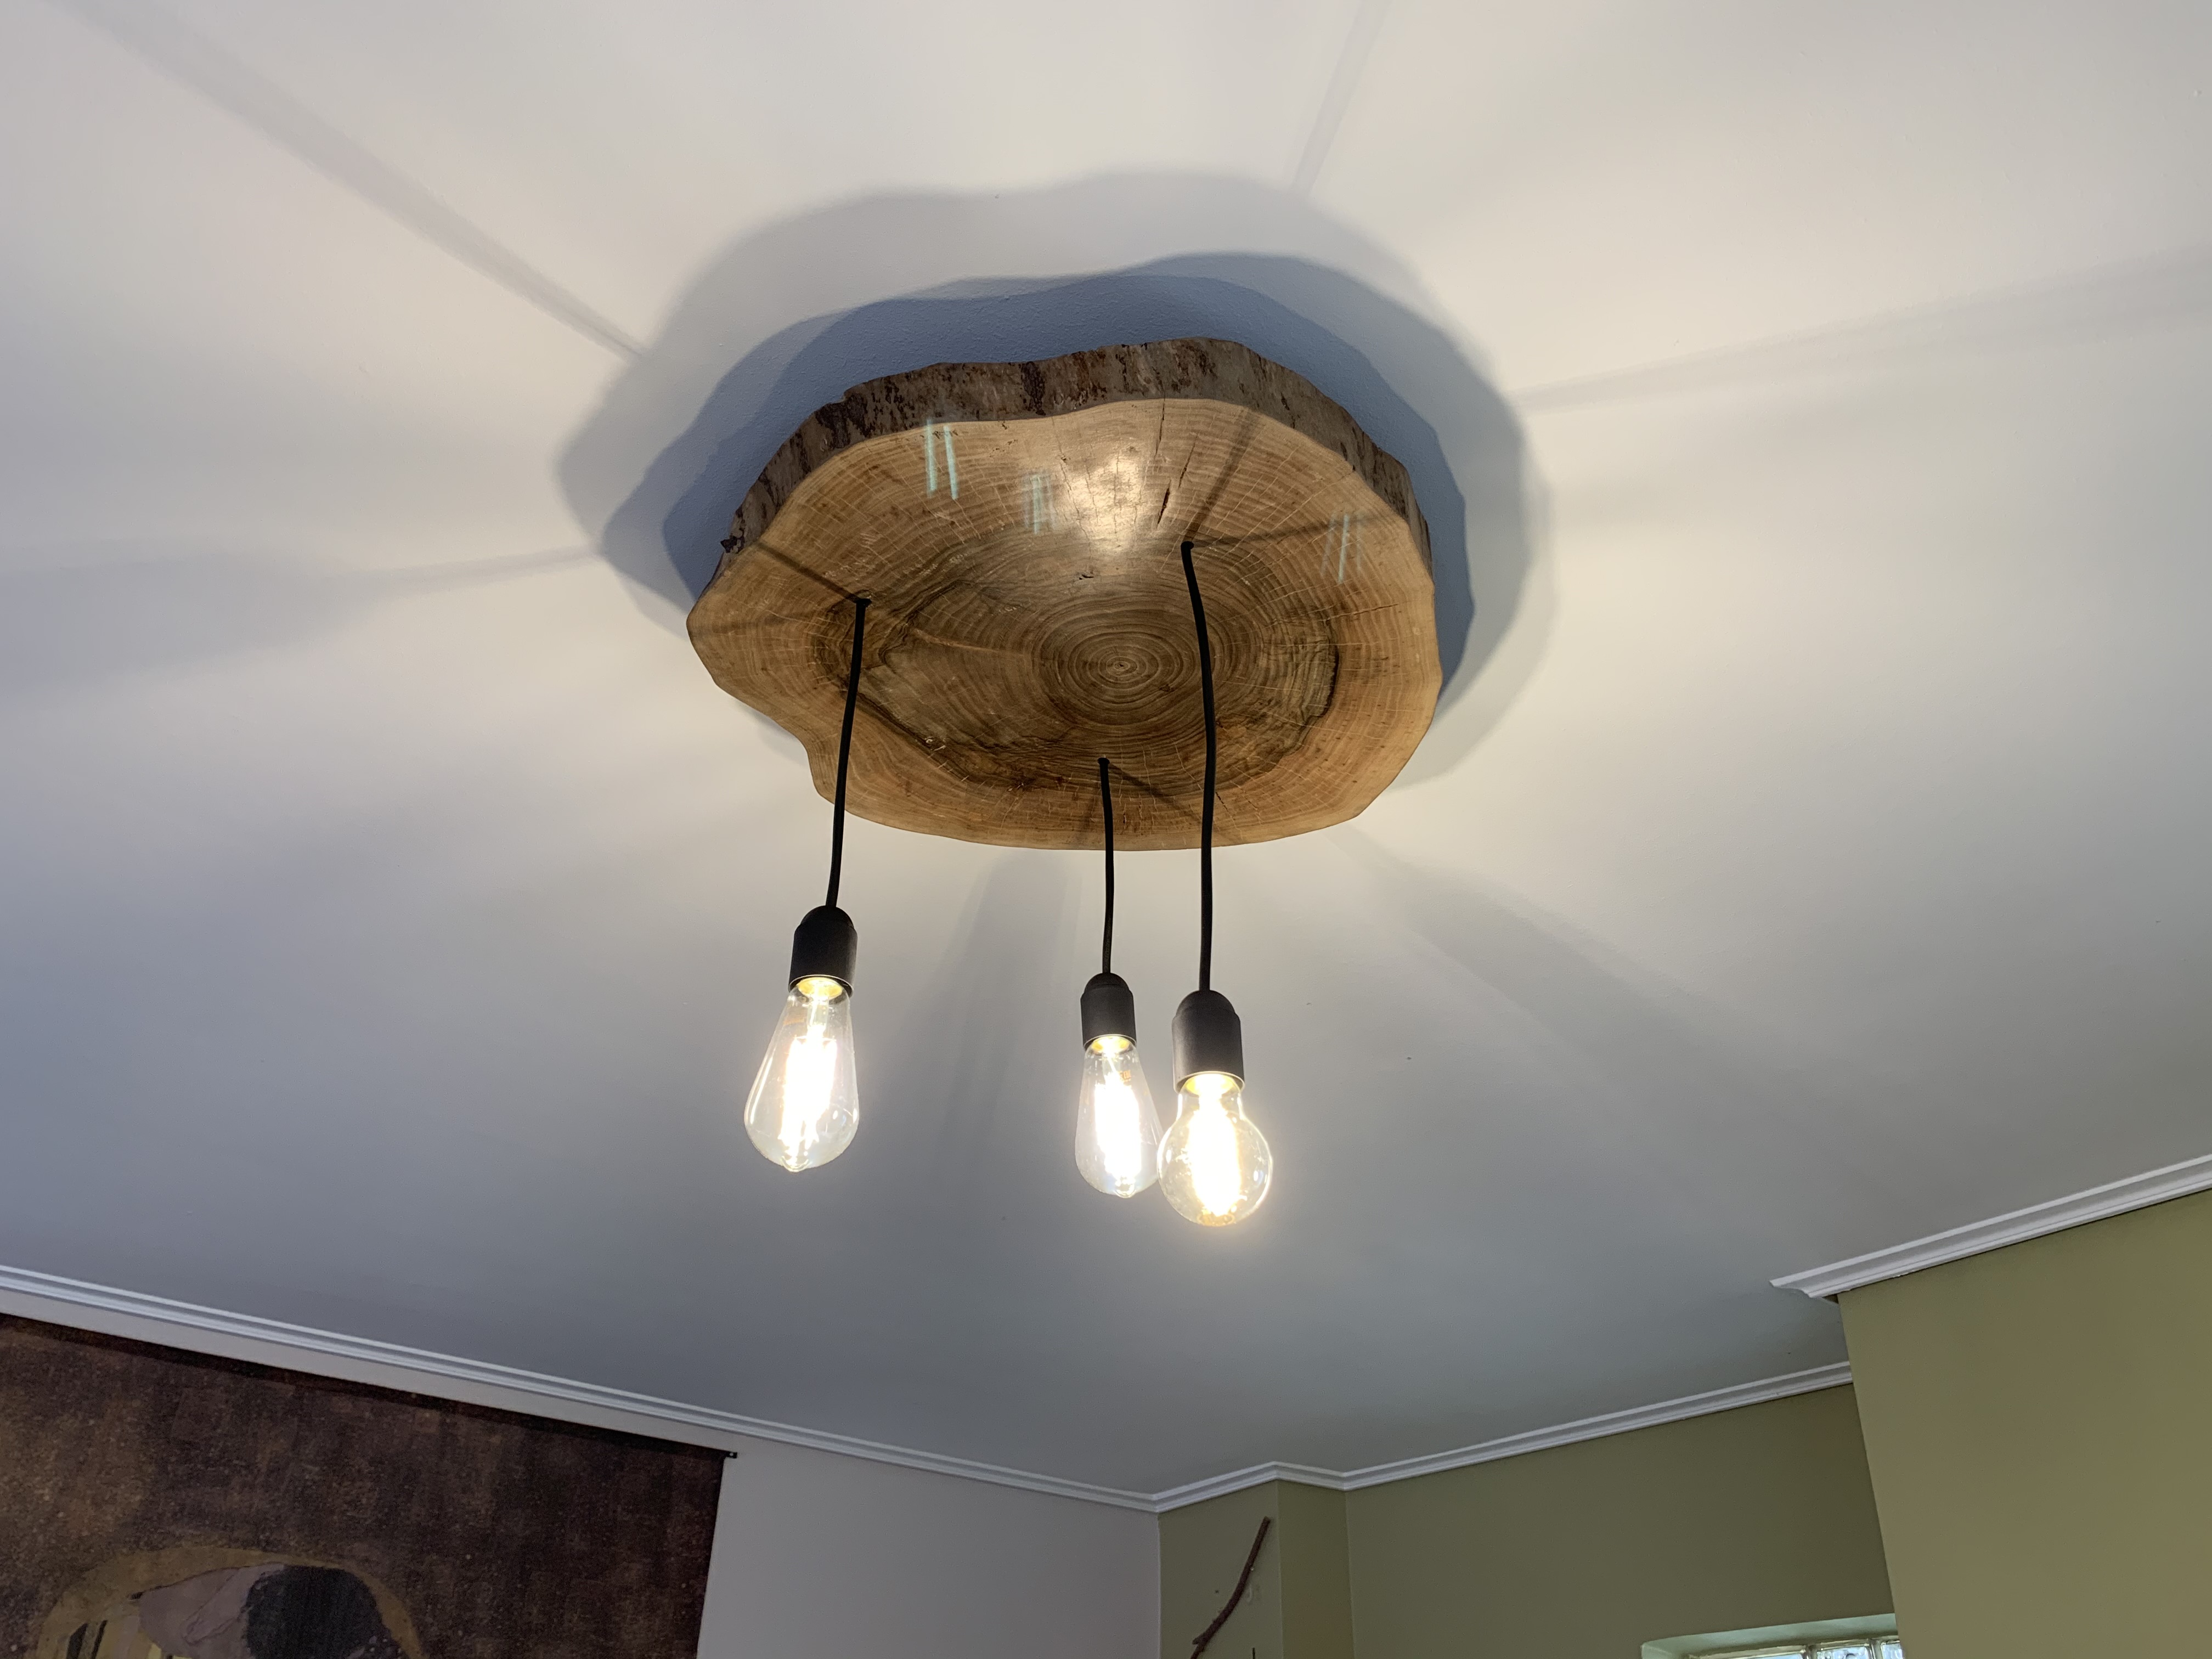
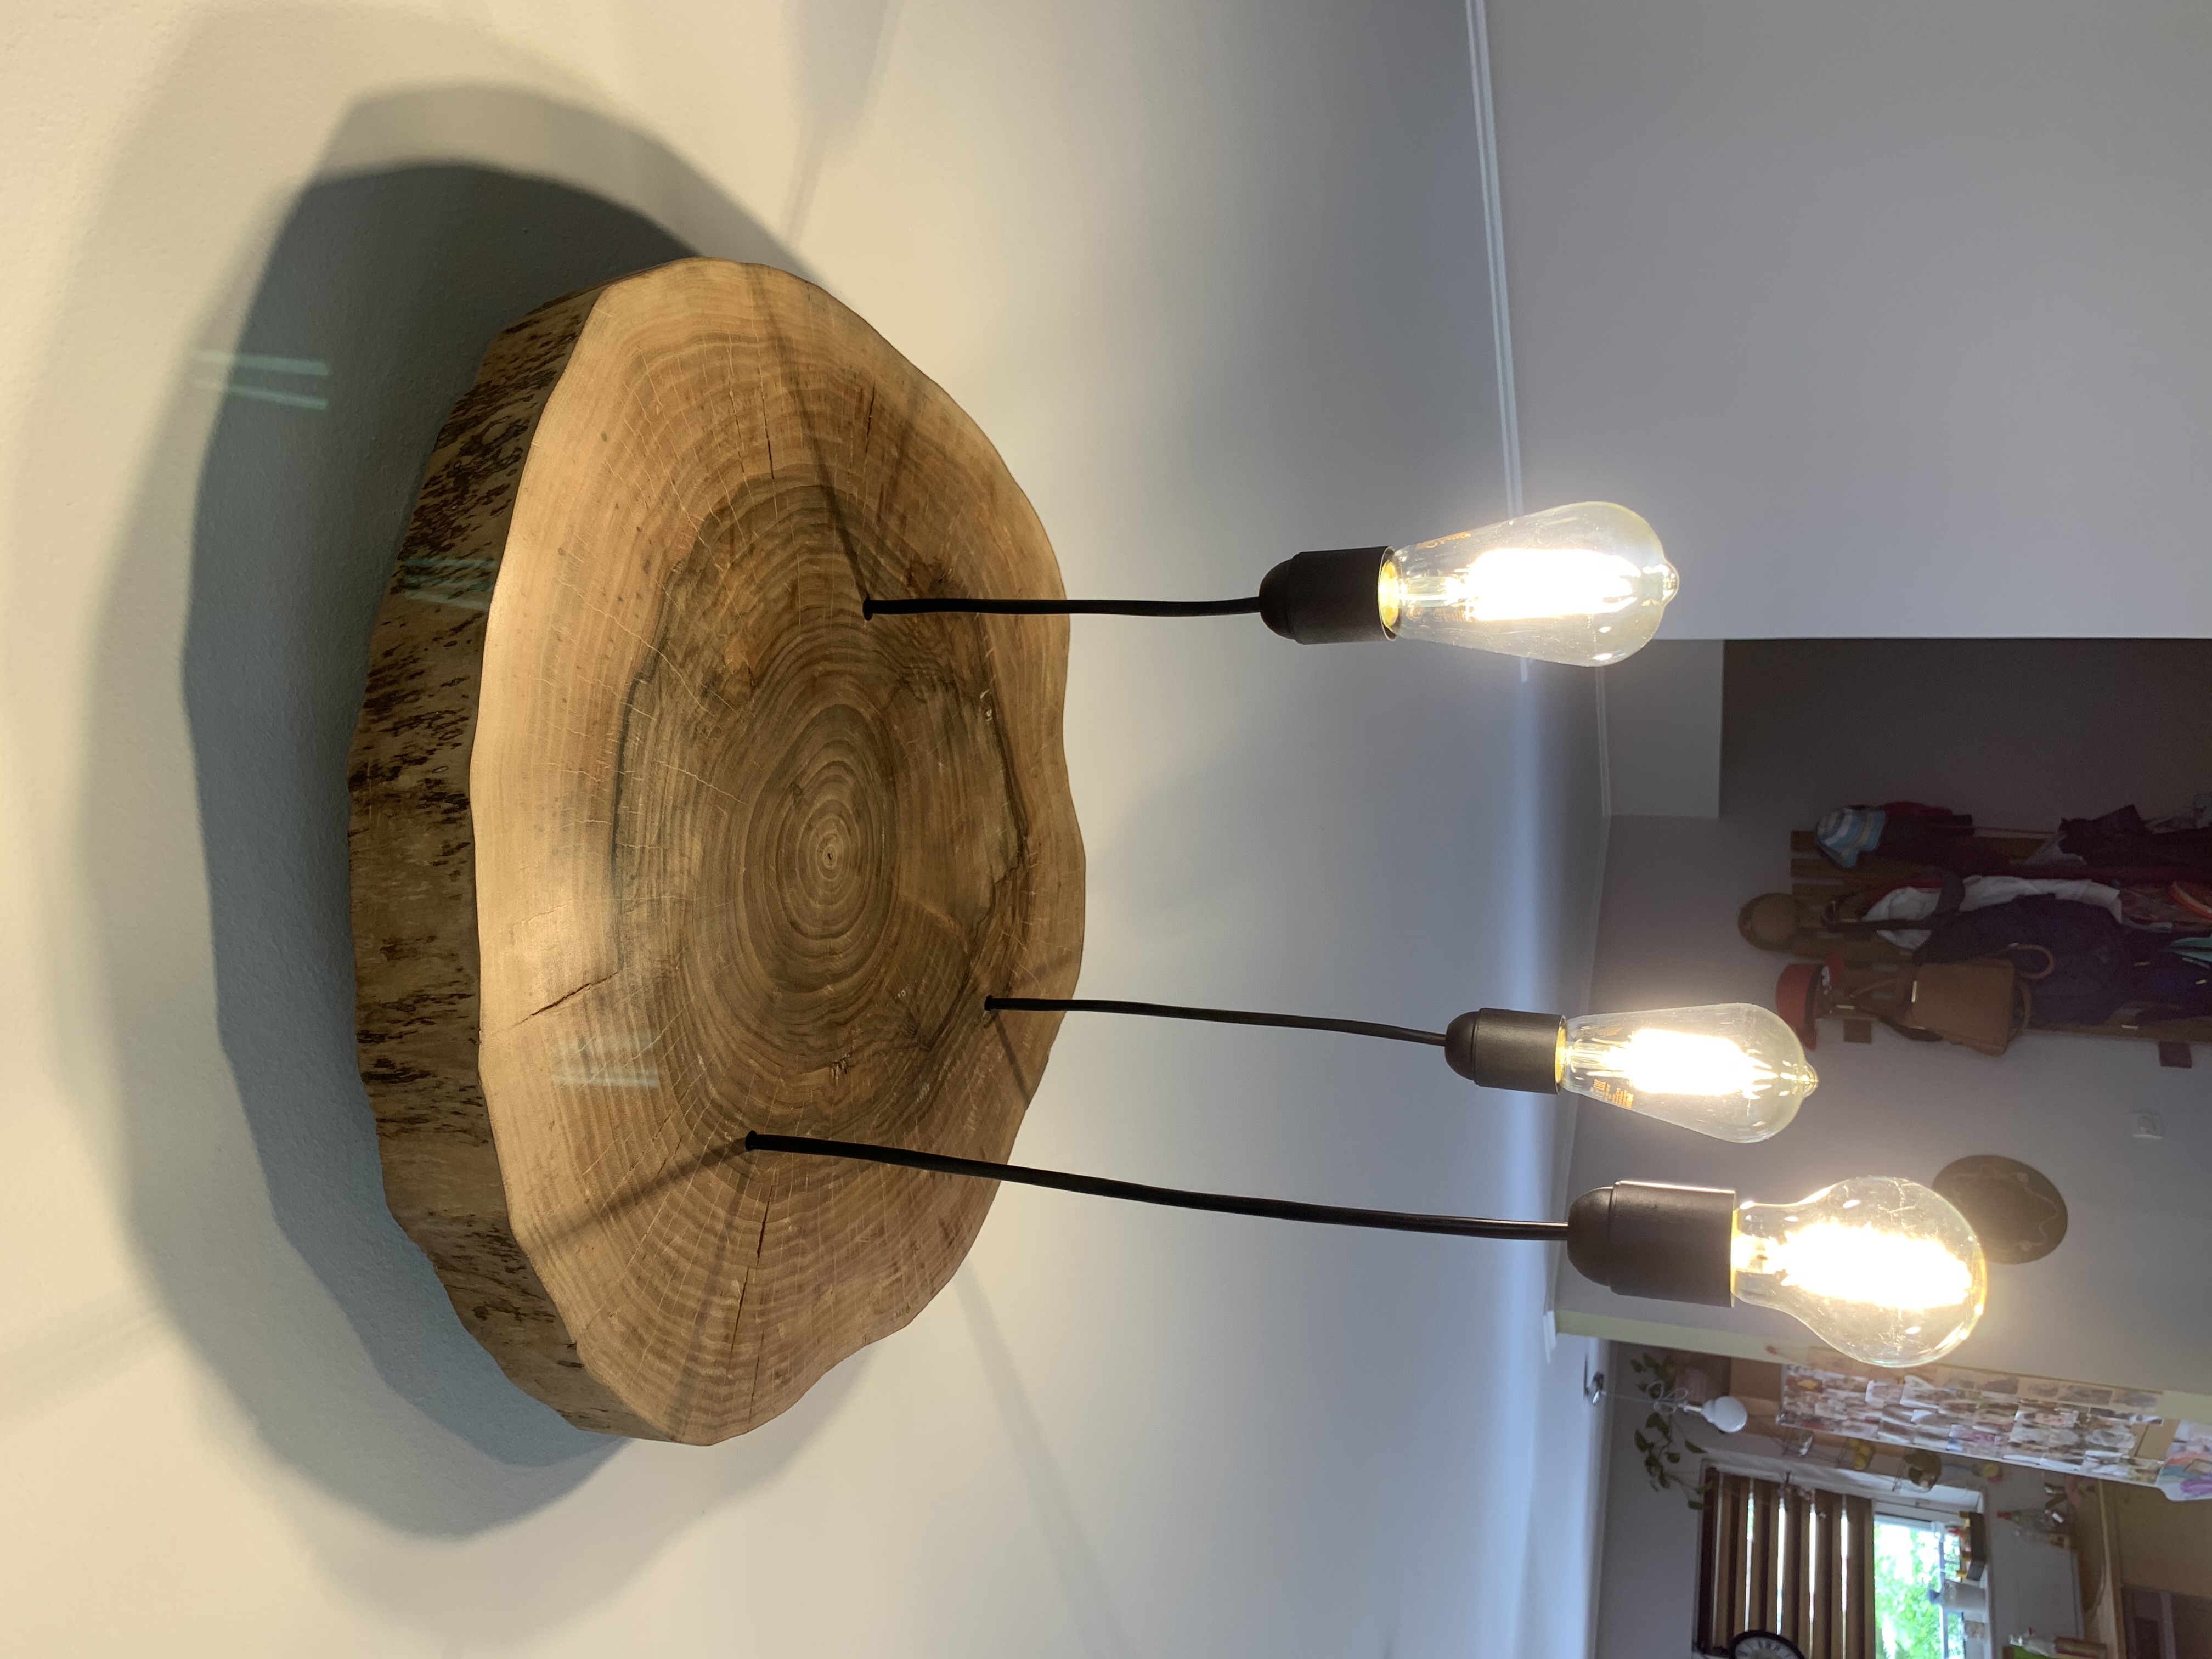
The Rooftop Lights
The two smaller slabs had already been sanded and varnished alongside the table slab, so the only work left was the conversion. The concept was simple: use each slab as a ceiling canopy, with three and four Edison bulbs respectively hanging from it on black textile cables.
For each fixture:
- Drilled three/four evenly-spaced holes through the slab for the cable runs, plus a central hole for the hook holder
- Routed a shallow recess on the back face so the slab sits flush against the ceiling
- Fed the cables through and connected the pendant holders
- Wired both fixtures and mounted them to the ceiling
The exposed filament bulbs complement the raw texture of the walnut perfectly. When lit, the grain glows and the shadow pattern on the ceiling shifts with the natural fissures in the wood.